
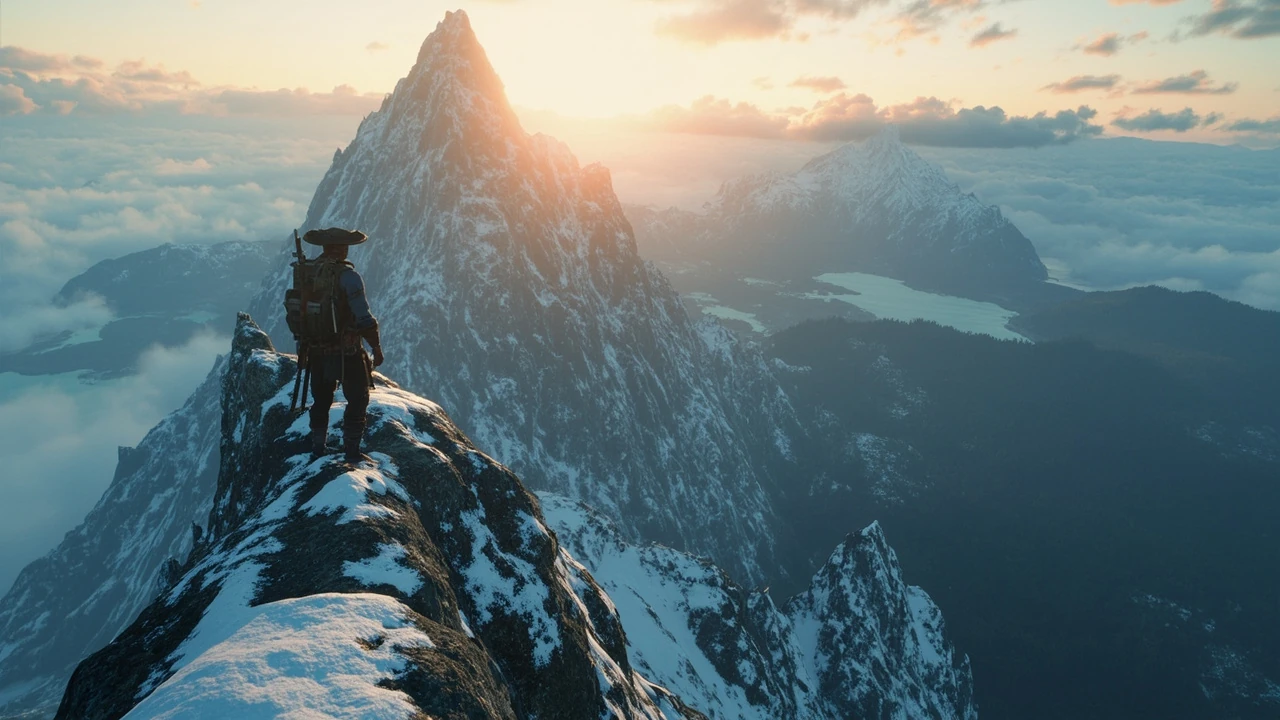
Owl mountain in Ghost of Yotei: how the region works as a designed open-world space
Walk north from the coast road and the map around owl mountain in Ghost of Yotei opens into one of the more legible vertical regions in the game. The peak is shaped like a folded wing, with a lower saddle that funnels travelers into a single switchback climb and a sharper upper spine that forces a careful, committed ascent. The route looks short on the map. The climb is staged so that altitude, weather, and visibility each become part of the experience rather than scenery behind it.
What makes the region worth a closer look is how one landmark is used to teach several open-world systems at once. Owl mountain acts as a navigation aid, a difficulty curve, a vantage point for unlocking parts of the map, and a self-contained challenge that rewards planning over reflexes. The sections below break the location down the way a player planning a real run would: where it sits on the map, how the path is staged, what to bring, what the summit gives back, and how the design choices compare with the open-world conventions of earlier Sucker Punch games.
Where owl mountain sits on the Ezo map
Three landmarks in the surrounding area shape how players approach the climb:
- A river-fed valley to the south that hides an outcrop with a clear line of sight to the saddle. It is a common respawn point for players who want to plan the climb before committing.
- A hunter’s camp to the east, used as a staging point for the upper section because the path narrows past it and cannot easily be reversed without a long descent.
- A shrine approach on the west face, marked by a torii gate and a short rope section. This is the most direct line to the true summit and the one used by experienced players.
The mountain is not gated by a single story mission. It is reachable once Atsu has the equipment for sustained cold weather and a reliable ranged weapon for the birds of prey that nest on the upper cliff bands. That equipment gating is the main reason casual players often approach it later than they expected, and why the climb feels harder than its distance on the map would suggest. Because the peak sits just below the snow line, it is also one of the first places in the central map where the climate transitions from coastal wind to alpine cold, so the climb doubles as a soft tutorial for the northern missions that follow.
Approach routes and the staging of the climb
There are three real routes to the summit. Each one tests a different skill, which is the kind of design choice that turns a landmark into a learning surface for the rest of the game. None of the three is a hidden path; all three are signposted at the trailhead so the choice is explicit before the climb begins.
Western shrine route (recommended first attempt)
The western route starts at a small shrine tucked into the tree line, climbs through a series of switchbacks, and ends with a short rope section that brings the traveler onto the upper spine. It is the most forgiving line because there are two natural rest points, the path is wide enough to draw a weapon without falling, and the wildlife density is lower than on the eastern approach. Players using the western shrine route typically reach the summit in 12 to 18 minutes of real-time climbing, depending on weather and how often they stop to clear camps. The shrine itself is a useful marker for screenshot runs because the torii gate frames the upper spine cleanly in the background.
Eastern ridge route (combat-heavy)
The eastern route leaves from the hunter’s camp and runs along a long, exposed ridge. It is faster than the western line in good weather, but the ridge funnels travelers past two wolf dens and a small bandit camp perched on a defensible outcrop. The combat is the point: this route is designed to teach players how to handle elevation-based duels, where a misplaced dodge sends a character over a long drop. It is the route most often used by players who want a tighter time on the climb at the cost of more encounters. The ridge also exposes the player to consistent crosswinds, which is useful for learning the new wind pattern that replaces the global waypoint system above the saddle.
Northern couloir (stealth and weather)
The northern couloir is a narrow snow-filled gully that cuts straight up the peak. It is technically the shortest line, but it is gated by a weather event: a sustained blizzard that reduces visibility to a few meters. Players who take the couloir need a cold-weather kit, a way to track the trail in whiteout conditions, and patience for the slow, deliberate progress the climb demands. It is the route favored by players who want the hardest version of the climb and the quietest path to the summit. The couloir also bypasses most of the camp content, which makes it the cleanest choice for a lore-focused run that wants to reach the summit without interruption.
What to bring, what to expect, and the resource check that decides the climb
Approaching owl mountain as a checklist problem is the cleanest way to avoid mid-climb failure. The table below maps the real constraints to the in-game systems they affect. It is the same planning frame a player would build after a failed first attempt, and it is the kind of resource check the production team describes as a core pacing tool for the northern map.
| Category | Specific item or state | Why it matters on the climb |
|---|---|---|
| Cold weather | Layered cloak, insulated boots, warmed sake or a fire kit | Cold damage scales with altitude; the upper spine drops temperature faster than any other region in the central map. |
| Stamina | Two or more stamina-boosting charms, a cooked meal with a stamina buff | The vertical sections are stamina-gated; running out partway up a switchback forces a long slide back to the last rest point. |
| Ranged weapon | A reliable bow with at least 30 arrows, a short blade for close work | Birds of prey attack from above; melee is risky on narrow ledges, and arrows that miss can roll a long way downhill. |
| Healing | At least six healing items, two of which cure cold-specific debuffs | Falling damage and cold stack quickly; one badly timed dodge can drain a full bar. |
| Map knowledge | Unlocked fast-travel point at the western shrine | Without a nearby fast-travel anchor, a death near the summit sends the player back to a lowland camp and costs a long recovery ride. |
| Time of day | Start the climb in late afternoon, plan to summit near dusk | Lighting on the upper spine is tuned for low-angle sun; starting at midday makes the snow glare harsher and the route harder to read. |
The resource check is not about minimum stats. It is about whether the player can survive a mistake at altitude. The climb is short, but it is not forgiving, because the recovery options thin out as the route climbs. A common mistake is to treat the cold-weather check as a flavor requirement rather than a hard one; the upper spine applies cold damage on a short timer, and the warmed sake has to be consumed before the timer expires, not after.
Owl mountain rises on the inland edge of the northern Ezo region, a short ride from the main settlement of Tōgetsu Fields. The peak sits between the forest belt to the west and a long ridgeline trail that loops south toward the hot springs, which makes it a natural mid-to-late game anchor. It is not the highest point in Ghost of Yotei, but it is among the most vertical, and it is positioned so that most of the central map is visible from its upper third on a clear day. The geography follows the way real Ezo peaks are described in the Wikipedia overview of the game, where the inland mountains are used to frame sightlines across the coast and the forest belt.
There is also a quiet resource check that most players miss: arrow count. The raptors on the upper spine do not drop arrows on death, and missed shots can roll off the cliff band and be lost. A player who enters the climb with the bow fully stocked and ends the climb with an empty quiver has effectively lost the kit for the next region, which is a design choice that pushes players toward melee as a default in the alpine zones.
Wildlife, combat, and the elevation-based duel problem
Combat on owl mountain is unusual because the elevation is the actual opponent. Wolves attack from below, which is the easy case. Birds of prey dive from above, which is the dangerous case, because the dodge direction that protects against a ground enemy exposes a character’s back to a raptor that is already mid-dive. The result is a small but consistent set of duels that punish players who treat the climb as a movement problem instead of a combat problem. The raptors are tuned to be faster than the wolves but lower in raw damage, which means a single raptor encounter is survivable while two simultaneous dive angles can chain a posture break before the player can recover.
Bandits are rare on the western route, common on the eastern ridge, and absent on the northern couloir. The design intent is that the player’s chosen route also chooses the combat profile. A player who avoids combat will pick the western or northern lines; a player who wants a tighter climb and more fights will pick the eastern ridge. The bandits on the eastern ridge are also positioned on a defensible outcrop, so they cannot be bypassed without losing the high ground advantage for the rest of the climb. That positioning turns a simple encounter into a route-shaping decision.
The elevation duel is also where the game’s stance system earns its keep. A low stance with a long blade is effective against wolves and human enemies, but it is the wrong choice against raptors, which need a high-stance parry into a quick counter. Players who try to rely on a single stance through the climb will lose more health to posture breaks than to outright damage, which is a quiet but effective way the game teaches stance switching as a real skill rather than a flavor option. The stance upgrade rewarded at the summit is a direct response to this lesson, and it is tuned to be most useful on the alpine and northern missions that follow.
What the summit gives back: loot, vista, and the map-unlock effect
The summit is not a dead end with a view. It is a designed payoff, and the design is unusually clean. The player receives four things at the top, and each one changes how the rest of the game is played.
- A named weapon, the Snowfall Katana, which is a cold-aligned blade that deals bonus damage to enemies affected by the cold debuff. It is the best-in-slot weapon for the late-game northern missions and the strongest katana in the game for cold-themed builds.
- A vista that unlocks a large wedge of the central map, including three previously hidden fast-travel points and two side-mission markers that are not visible from the lowlands.
- A short, optional duel with a duelist who has been waiting at the summit. The duelist is not required, but defeating them unlocks a stance upgrade that simplifies stance switching for the rest of the run.
- A lore note that ties owl mountain to the broader Ezo setting, useful for players who want the story beats that the main quest does not spell out.
The vista is the most important unlock, because it changes the routing of the next ten or fifteen hours of play. Two of the newly revealed fast-travel points are positioned so that the player can chain the southern hot springs, the western forest belt, and the coastal road without returning to a lowland camp, which compresses what would otherwise be a slow sequence of long rides. The third fast-travel point connects directly to a hunting ground that is otherwise gated behind a side quest, so the vista effectively shortcuts the entire southern corridor.
The lore note is also worth reading before leaving the summit. It frames owl mountain as a watchpost used during the earlier conflicts on the island, which gives the climb a narrative weight that is easy to miss on a first run. Players who skip the note will still get the mechanical rewards, but the climb will feel like a content node rather than a place; players who read the note will start to read the surrounding peaks in the same way for the rest of the game.
How owl mountain compares with the open-world conventions of the series
Sucker Punch has a long track record of using landmarks as gameplay surfaces, and owl mountain is the clearest expression of that approach in Ghost of Yotei. The table below compares the design choices against the conventions established in the earlier Ghost of Tsushima, so that the design intent is visible side by side.
| Design element | How it appears in earlier Sucker Punch open worlds | How it appears at owl mountain in Ghost of Yotei |
|---|---|---|
| Verticality as a teaching tool | Used in scattered shrines and a small number of late-game peaks, but usually as scenery | Central design driver: the entire climb is staged around altitude, weather, and stamina |
| Wind as a navigation aid | Introduced as a global waypoint system across the open world | Replaced by a more local wind pattern that only activates above the saddle, so the system has a region-specific identity |
| Summit payoff | Mostly cosmetic vistas with a small cosmetic reward | Weapon, stance upgrade, map unlock, and a lore note, all tied to the route taken |
| Route diversity | Two routes per major landmark in most cases | Three distinct routes that each test a different skill set |
| Weather gating | Used as a global visual layer rather than a route gate | Used to lock the northern couloir behind a specific weather event |
The shift is small in any single column, but the cumulative effect is a landmark that feels designed to be climbed, not designed to be seen. For players who are interested in the production side, the design note published by DigiPen on producing the game describes how the team approached non-linear open-world pacing and how landmarks like owl mountain were used to teach systems in situ rather than through separate tutorial spaces. The same note is useful for understanding why the routes are signposted at the trailhead rather than discovered through exploration, and why the rewards are tied to the route taken rather than to a single summit trigger.
It is also worth noting that the comparison is not symmetrical. Ghost of Tsushima used wind as a global navigation layer because the open world was larger and the landmarks were more spread out; Ghost of Yotei uses local wind patterns because the central map is denser and the player is expected to read the environment directly. Owl mountain is the first place where that change becomes obvious, and it is also the place where the new wind pattern is taught most explicitly, which is why the climb is a useful case study even for players who are not interested in the production side.
Common failure modes and the diagnostic that points to the fix
Most failed climbs at owl mountain fall into one of four patterns, and each one has a clear diagnostic signal. Treating the failure as a planning problem rather than a reaction problem is the fastest way to a clean run. The four patterns below are not exhaustive, but they cover the cases that show up most often in community playtests and in the bug reports that the developers have acknowledged in post-launch patches.
- Cold damage stacking in the upper third. The diagnostic is a slow, continuous chip damage that does not respond to healing. The fix is layered cold gear and a warmed consumable before crossing into the upper spine.
- Stamina failure mid-switchback. The diagnostic is a long, uncontrolled slide back to the last rest point. The fix is a stamina charm, a pre-climb meal, and a slower cadence on the vertical sections.
- Raptor dive damage. The diagnostic is repeated high posture breaks with no obvious attacker. The fix is switching to a high stance and using a parry into a counter for the duration of the climb.
- Death near the summit with no fast-travel anchor. The diagnostic is a long recovery ride after every failed attempt. The fix is unlocking the western shrine fast-travel point before starting the climb, even on a scouting run.
These four patterns cover the majority of failed attempts in community play. The pattern that surprises new players is the raptor case, because the enemy is easy to miss against a bright sky, and the dive is fast enough that the player often takes the hit before the source is identified. The pattern that surprises experienced players is the cold damage case, because the chip damage is small enough to feel cosmetic until it stacks with falling damage from a single bad dodge, at which point the full bar disappears faster than the heal can keep up.
There is also a fifth pattern that does not appear in the table because it is rare, but it is worth mentioning: the wind pattern above the saddle can briefly desync during a fast weather transition, which causes the local gusts to misalign with the player’s intended path. The fix is to stop moving for a few seconds and let the wind reorient, then resume the climb. This is a known issue from the post-launch patch notes and is not a sign of a broken save file.
Route selection by player style
Choosing the route to owl mountain is a real decision, and the right choice depends on the player’s preferred style, the current build, and the goals for the run. The table below maps the three routes to a small set of player profiles so the choice is visible at a glance. The profiles are not exhaustive, but they cover the common archetypes that show up in the late-game meta: cold builds, posture builds, and generalist builds that are still scouting the region.
| Route | Best fit for | Main trade-off |
|---|---|---|
| Western shrine | Players who want a clean first run and the most reliable summit | Longer real-time climb, lower combat density, fewer skill rewards |
| Eastern ridge | Players who want a tighter time and more duels | Higher combat density, more posture risk, faster clear in good weather |
| Northern couloir | Players who want the hardest version of the climb and a quiet ascent | Weather-gated, slow, requires a complete cold kit and a whiteout-ready plan |
Players who are running a cold-themed build for the late game should aim for the northern couloir, because the cold-aligned rewards scale with the time spent in cold weather, and the couloir is the route that gives the most consistent cold exposure. Players who are running a posture or stance build should aim for the eastern ridge, where the duels generate the most stance XP per minute. Players who are running a generalist build or scouting the region for the first time should start with the western shrine route and use the summit as a planning vantage for the rest of the map.
There is also a hybrid approach that works for players who want both the cold rewards and the duelist stance upgrade. The hybrid is to climb the western shrine route on the first attempt, fast-travel back to the western shrine after the summit, wait for a clear weather window, and then take the eastern ridge on a second attempt. The second attempt benefits from the map knowledge and the unlocked fast-travel point, which makes the duels more efficient. This approach is slower in real time but cheaper in resources, and it is the one favored by players who are running the climb as part of a longer northern route.
Planning the climb as a production problem
Treating owl mountain as a production problem is a useful exercise for players who are interested in the design side of open-world games, because the region is a compact case study in how a small space can teach several systems at once. The climb is a vertical difficulty curve, the weather is a route gate, the raptors are a stance lesson, and the summit is a payoff that changes the next ten hours of routing. None of those systems is new on its own; what is new is the way they are stacked in a single, short climb. The same stacking technique is used at a smaller scale in the southern hot springs and at a larger scale in the northern missions, which means owl mountain is a useful midpoint for understanding the rest of the map.
Players who want to dig further into the production side can read the DigiPen showcase on how the team approached non-linear pacing, which discusses how open-world pacing was structured around landmarks like this one and how the team balanced the desire for systemic teaching against the risk of front-loading the map. The same piece is useful for understanding why the climb is signposted so explicitly, and why the rewards are tied to the route taken rather than to a single summit trigger.
For a planning-focused player, the climb at owl mountain is also a good test of how the rest of the map should be approached. The same checklist pattern that works for the mountain works for the larger open world: confirm the resource state, pick the route that matches the build, plan the recovery anchor, and treat the summit as a vantage point for the next region rather than an end in itself. That pattern is not unique to this climb, but it is more legible here than anywhere else on the central map, which is why the mountain is a good first stop for players who are still learning the new pacing structure.
Frequently asked questions
Where is owl mountain in Ghost of Yotei located on the map?
Owl mountain is in the northern Ezo region, on the inland edge of the central map. It sits between the forest belt to the west and a long ridgeline trail that loops south toward the hot springs. The closest fast-travel anchor for most players is the western shrine at the base of the climb.
What level should I be before attempting owl mountain in Ghost of Yotei?
The mountain is not gated by a single level, but it is gated by equipment. Players need a layered cold-weather kit, a reliable ranged weapon, and a fast-travel anchor at the western shrine before the climb becomes reliable. Most players reach a comfortable setup after the second major story arc in the northern region.
Which route to owl mountain is the easiest?
The western shrine route is the most forgiving line. It has two natural rest points, a wider path that allows safe weapon draws, and lower wildlife density. Players who want a clean first attempt should start with the western route before trying the eastern ridge or the northern couloir.
What is the reward for summiting owl mountain in Ghost of Yotei?
The summit gives the Snowfall Katana, a cold-aligned weapon that is best-in-slot for late-game cold-themed builds. It also unlocks a large wedge of the central map, including three new fast-travel points, two side-mission markers, an optional duelist that grants a stance upgrade, and a lore note that ties the mountain to the broader Ezo setting.
Can I climb owl mountain in Ghost of Yotei during a blizzard?
The northern couloir is only accessible during a sustained blizzard event. The western and eastern routes are open in any weather, but the upper spine is colder and harder to read in heavy snow. Players attempting the couloir should bring a complete cold kit and a plan for tracking the trail in whiteout conditions.
How long does the climb to the summit take?
The western shrine route takes 12 to 18 minutes of real-time climbing for a prepared player, the eastern ridge is faster in good weather but longer in combat, and the northern couloir is the shortest in distance but the slowest in real time because of the reduced visibility. Plan for around 25 to 40 minutes total when including combat and rest stops.
Is the raptor fight at the summit optional?
The duelist at the summit is optional. Defeating the duelist grants a stance upgrade that simplifies stance switching for the rest of the run, but the katana, the map unlock, and the lore note are all available without engaging the duelist. Players who want a quieter summit can skip the fight and still receive the main rewards.
What is the best build for climbing owl mountain in Ghost of Yotei?
A cold-themed build is the strongest choice because the Snowfall Katana scales with cold debuffs. A posture or stance build is the second strongest because the raptors and the summit duelist generate the most stance XP. Generalist builds can complete the climb reliably with the western shrine route and a complete cold kit.
Leave a Reply