
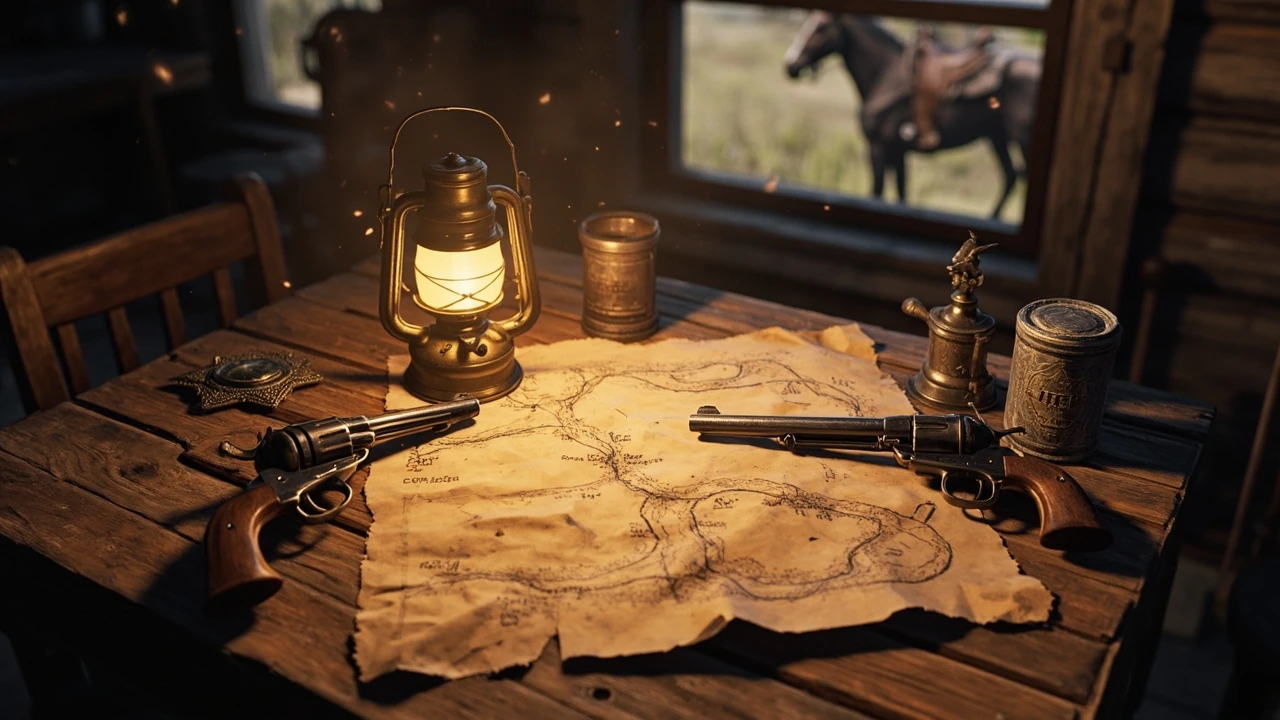
RDR2 treasure maps: how every hunt actually works
The treasure maps in Red Dead Redemption 2 send a player on a short investigation built around the same loop: read the hand-drawn clue, find the matching landmark in the open world, and dig at the indicated spot to reveal a small stash. Most players ignore them on a first playthrough because the maps are sold quietly by NPCs in general stores, tucked inside gang hideouts, or handed over as a reward for a stranger mission. They still matter, because each one pays out with a permanent reward: usually a gold bar worth $500 at a fence, a piece of unique gear, or a rare cosmetic item. The buried item is rarely a single coin in the dirt; the actual prize is the chain of decisions that teaches a player how Rockstar composes clue art, environmental landmarks, and dig triggers into a single puzzle.
What follows is a full walkthrough of how the system is designed, where to find every map, how each clue resolves into a real location, and what players and designers can take from the way the hunts are structured. Players who only want the reward route can skip to the per-map table. Readers interested in how a clue-to-location system is built, balanced, and tuned for a living open world will find the structural breakdown in the middle sections.
The structure of an RDR2 treasure map
Each RDR2 treasure map is a single piece of paper with a hand-drawn sketch and a short written hint. The sketch shows a recognizable feature: a rock shaped like a skull, a broken tree, a hanging body, a specific rock formation, or a long stretch of fence. The text clue is short, often cryptic, and uses a name, a phrase, or a riddle that the open world also encodes in its geography. A successful hunt reads the clue, opens the in-game map to confirm a region, then physically rides to the landmark and looks for a small interaction prompt that allows digging.
Rockstar’s design choice is that the map is a portable reference, not a quest item. The moment the player inspects it, the artwork and text stay on the in-game map screen as a sub-marker. There is no quest log entry, no objective arrow, and no NPC follow-up. This is an important constraint for designers because it shifts the burden of interpretation onto the player. There is no auto-quest to fall back on, so the clue art has to be legible, and the matching landmark has to be visually distinct in the world at a glance.
The paper itself is treated as a collectible. It can be sold, dropped, or stored, and the game does not warn the player when a map is about to be sold for a few dollars. That is part of the design: the player has to learn that the paper is worth more than the vendor price. Once a map has been inspected, the sub-marker stays active until the player inspects a different map, which is why carrying more than one active map at a time is a common source of confusion.
How clues map to landmarks
Every clue in the system reduces to one of three matching patterns. Understanding them is the fastest way to solve a hunt without a guide.
- Visual silhouette: the drawing is a stylized but accurate shape of a real feature. Examples include a rock face that looks like a face, a tree split by lightning, or a specific bridge span. The player has to recognize the shape at distance, often from horseback, before the silhouette dissolves into background terrain.
- Textual region: the clue names a place the player has already visited or heard about, such as a station, a swamp, a fort, or a landmark visible on the in-game map. The drawing then narrows the area inside that region.
- Symbolic puzzle: the clue uses a metaphor or a local superstition. A drawing of a “dead man walking” usually points to a hanging tree or a specific grave. A drawing of a “talking tree” refers to a hollow tree that resonates when struck.
Most RDR2 treasure maps combine two of the three patterns. A typical clue is a region name plus a silhouette, which is enough to narrow a 1 km square of the world to a 50 m radius where the dig prompt appears. This layered design also makes the hunts accessible at different skill levels: a player who reads the text finds the region, a player who reads the art finds the exact shape, and a player who only recognizes the silhouette can still solve the map if they ride the area slowly and look for the most unusual feature on the horizon.
There is a fourth, less obvious pattern that shows up in a few of the smaller maps: sensory language. A clue about “the smell of burning flesh” or “where the water roars” does not draw a shape at all. It describes a place the player has to interpret from sound, smell, or movement. These clues are the hardest in the game because they cannot be solved from the in-game map, only from a long ride and a careful listen.
Map progression and the high-stakes hunt
The full treasure-hunt system is split into two categories. The first is the high-stakes treasure map, a multi-stage hunt that begins with a single map and leads to a final gold bar. The second is the smaller loot maps sold by general store owners, fence operators, and hermit NPCs. Each has its own design intent and its own place in the player’s economy.
High-stakes treasure maps are designed as a narrative through-line. The player meets a treasure hunter, sees a body or a camp, picks up a single map, and then rides a long distance to a dig site. The first dig reveals a second map, which leads to a second dig, and so on until the final stash. This structure mirrors a chapter mission: one entry point, several waypoints, a payoff that advances the player’s wealth curve, and no further involvement from the giver. The multi-stage approach also lets Rockstar pace rewards across multiple play sessions, since a single hunt can span five to ten in-game hours depending on how the player routes it.
The smaller loot maps are designed as side content. They are sold for a small fee, written by anonymous writers, and lead to a single dig. They teach the same clue-to-location loop in miniature and reward the player with a useful consumable or a unique clothing item. They matter to the game’s economy because they convert free exploration time into a clear, repeatable micro-objective, which is a more honest use of a player’s downtime than aimless wandering.
Where to start every high-stakes hunt
The high-stakes chain is the most important hunt in the system because its final reward is one of the largest single payouts in the base game. The chain begins at a cliffside treasure site north of the map, where the player can find a frozen body and a torn map. The first clue is the one that most players solve by accident, because the body is visible from a nearby road and the in-game map records the inspection automatically the moment the player crouches beside it.
The chain can be started in either chapter two or chapter three. Starting it early is the best choice for a player optimizing wealth, because the final gold bar can be sold to a fence for $500, which is enough to fund several early-game upgrades including a better saddle, a reinforced satchel, and a full set of camp improvements. Players who start it later do not lose the chain, but the reward is no longer as impactful once the player has access to a stable income through other means such as bounty hunting or stagecoach robberies.
There is a small risk in starting the chain too early: the player can out-level the intended difficulty. The first dig site sits in a cold region with low visibility, and a player on a fresh save with no warm clothing can find the ride longer than expected. The fix is to layer up before leaving camp, then ride directly to the cliff, dig, and warm up at the nearest settlement.
Stage-by-stage progression
Each stage of the high-stakes hunt follows the same beat: find a map, ride to a region, dig, and receive the next map. The full sequence of clues, the matching landmarks, and the rewards are summarized in the table below. The “clue” column is the short phrase or visual that the player sees on the paper. The “where to dig” column is the matching landmark in the world. The “reward” column is what the player receives at the end of that stage.
| Stage | Clue on the map | Where to dig | Reward |
|---|---|---|---|
| 1 | Sketch of a face-shaped rock near a frozen lake | Face rock north of the map, near a frozen waterfall | Second map, no gold yet |
| 2 | “Where the dead walk and the trees whisper” | Swamp grove with a hanging tree, south of Lagras | Third map |
| 3 | Rough drawing of a broken chimney near a small house | Ruined homestead east of the Heartlands, near a stone chimney | Final map and a small cash bundle |
| 4 | “Beneath the remains of a great beast” | Skeleton of a large animal on a ridge in Big Valley | Gold bar worth $500 at a fence |
The chain is intentionally linear. Each clue is solvable with the information from the previous one, and each dig site is a real landmark rather than a hidden trigger. The pacing also teaches the player to read the clue art carefully. By the third stage, the player has usually learned to look for shape, not text, which makes the smaller loot maps trivial. The fourth stage is also a quiet lesson in orientation: the skeleton is on a ridge that is easy to overshoot from the south, so the player has to approach from the north road to see it clearly.
The smaller loot maps and what they pay out
Beyond the high-stakes chain, Red Dead Redemption 2 has a long tail of smaller loot maps. They are sold in general stores, given as stranger mission rewards, and occasionally found as ambient world pickups. They are independent of each other: solving one does not unlock the next. The table below summarizes the maps that appear in every copy of the game, the seller, the location, and the reward.
| Map seller or source | Approximate cost or trigger | Landmark type | Reward |
|---|---|---|---|
| General store in Rhodes | Purchased, low cost | Rock formation | Unique revolver cartridge belt |
| Fence at Emerald Station | Purchased, moderate cost | Standing tree | Gold bar |
| Hermit trader near the forest edge | Purchased, low cost | Bridge arch | Tonics bundle |
| Stranger mission: “The Smell of Burning Flesh” | Quest reward | Old mill | Gold bar |
| Stranger mission: “The Widow” | Quest reward | Wrecked wagon | Unique hat |
| Random world pickup | Inspection prompt on a body or table | Rock arch | Small cash bundle |
| Camp ledger request from a gang member | Camp upgrade path | Cabin foundation | Unique coat |
The smaller maps are designed to teach a different lesson: the world itself is a puzzle. A player who completes several of them learns to stop looking for an objective arrow and to start scanning the environment for the matching shape. Once that habit is established, every other map becomes a five-minute ride and a single dig. From a design perspective, the smaller maps are also where Rockstar experiments with different clue types. A good example is the “smell of burning flesh” map, which uses a sensory phrase rather than a visual one, and rewards the player who translates the phrase into a mill, where smoke is a permanent world feature even in clear weather.
Two of the smaller maps are tied to stranger missions rather than vendors, and they are easy to miss because the player has to complete the mission before the map is handed over. “The Smell of Burning Flesh” is the more obvious of the two, because the mission title mirrors the clue on the map. “The Widow” is the easier one to skip, because the mission can be completed without ever inspecting the cabin that contains the map, and the cabin is in a remote part of the map that most players only visit while hunting.
How dig sites are built into the world
Every dig site is a real location with two parts: a visual marker and an interaction trigger. The visual marker is a small disturbance in the ground, often a darker patch, a cracked stone, or a disturbed mound. The interaction trigger is a context-sensitive prompt that appears when the player stands in the right radius and aims at the marker. The two are separate on purpose. The visual marker is what the player has to find, and the interaction trigger is what tells the game the player has found it.
For the player, this means a successful dig usually looks the same: ride to a landmark, walk a slow circle around it, and watch for a prompt to appear at the player’s feet. For the developer, the split between visual and trigger matters because it lets the world art team place the marker by hand, while the scripting team attaches the trigger to a single world node. This is the same pattern used in most open-world treasure systems, and the broader discussion of how the game’s economy and side content are built around small, hand-placed rewards is covered on the Red Dead Redemption 2 Wikipedia page, which frames the side content as a deliberate counterweight to the main story rather than filler.
The trigger radius is intentionally tight. If the player stands too far away, the prompt does not appear, even if the marker is visible. This is a deliberate pacing choice. It forces the player to dismount, walk the last few meters, and engage the world at walking speed. Slowing the player at the moment of reward is a long-standing technique in open-world games, because it turns a fast ride into a small, satisfying ritual and gives the player time to read the dig prompt before committing.
A second, less obvious design choice is the camera. When the player aims at a dig site, the camera lowers slightly, which puts the marker in the center of the screen and hides the wider landscape. This is a small visual cue that the player has found the right spot, even before the prompt appears. It is also why most failed digs are resolved by aiming slightly to the side, which restores the wider view and lets the player re-approach the marker from a better angle.
Common failure points and how to avoid them
Most players fail a hunt for one of three reasons. Each is easy to diagnose and fix once the player knows what to look for.
- Wrong region: the clue names a place, but the player confuses two places with similar names. A common example is the difference between the two train stations on the eastern rail line, both of which have similar-sounding names on the in-game map. The fix is to open the in-game map and confirm the written region before riding, paying close attention to the small text under each station marker.
- Wrong landmark: the player finds the right region but cannot match the silhouette. The fix is to dismount, climb a small rise, and look at the area from a higher angle. Most landmarks are recognizable from distance once the player changes elevation, because the silhouette becomes clearer against the horizon line.
- Trigger not firing: the player is at the right spot but does not see the dig prompt. The fix is to walk a slow circle around the visible marker, because the trigger radius is tight and the prompt only appears when the player faces the marker directly. Aiming slightly off-center and re-aiming usually forces the prompt to appear.
A fourth, less common failure is carrying a different map in the active slot. The game only shows a sub-marker for the most recently inspected map. If the player picks up a second map, the first one is no longer pinned on the in-game map, which can lead to a long ride for the wrong clue. The fix is to inspect the first map again before riding, which re-pins the sub-marker and removes the second map from the active slot.
A fifth failure, which only shows up on PC, is the input binding. The dig prompt is bound to a context action that is sometimes remapped by players who use a controller layout. If the prompt never appears even at the right spot, the player should check the key bindings and confirm that the context action is still mapped to the expected button. A default binding almost always resolves the issue.
Economy, pacing, and design lessons
From a design standpoint, the treasure map system is a small study in how to teach a player a new behavior. The first map a player finds is almost always the high-stakes chain, because it is the most visible. That first chain is the lesson: read the clue, find the landmark, dig, and receive the next map. By the time the player finishes the chain, they have internalized the loop. The smaller loot maps then reward the loop with a different payout per map, which keeps the loop interesting without changing the rules.
The pacing is also worth noting. The high-stakes chain pays out once, but the small maps pay out many times, with a mix of consumables, gold bars, and cosmetic items. This split is a common pattern in live-service economy design: one large one-time reward to teach the loop, and a long tail of smaller rewards to keep the loop engaging over time. The same pattern appears in many other games, and it works in Red Dead Redemption 2 because the small maps are short enough to fit into a single play session and varied enough that no two payouts feel identical.
There is also a small but useful social effect. Treasure maps are one of the few systems in the game that players share without prompting, because the rewards are tangible and the route is short. A player who finishes a small map in twenty minutes is more likely to tell a friend about it than a player who finishes a stranger mission, because the map has a clear, visible payoff and a clean ending. That word-of-mouth loop is part of why the system has been studied by other studios, even outside the Western genre.
Tips for solving clues without a guide
The fastest way to solve a clue is to read the text, find the named region, then ride to the matching landmark. The second fastest way is to ignore the text and scan the area for the silhouette. Most players benefit from doing both at once, because the text narrows the search and the silhouette confirms the exact spot.
- Open the in-game map first and pin the sub-marker. This saves a long ride if the player reads the clue wrong, because the sub-marker can be re-inspected from any campfire or settlement.
- Read the clue art from the top down. Most drawings place the largest feature at the top, which is the easiest to spot from distance, with smaller details at the bottom that confirm the exact spot once the player is close.
- Use a horse with high stamina for hunts that span two regions. A stamina drain in the middle of a hunt forces the player to dismount and walk, which slows the entire loop and can push the player into hostile territory at the wrong moment.
- Save before digging. A failed trigger can be retried by reloading the save, which is faster than re-riding the entire chain and avoids the risk of a random encounter resetting the player’s route.
- Sell gold bars at a fence, not a general store. The fence price is consistent across the game, while a general store will only buy the bar at a fraction of its value. The fence is the correct vendor for every map-based gold bar, and a player who sells at a general store is leaving real money on the table.
Players who want to optimize the reward timing can also plan the route around fast-travel points. Most camps and settlements have a fast-travel post that the player can use after completing the final stage of a hunt, which makes the return trip almost free. The high-stakes chain is the easiest to plan this way, because each stage ends in a different region, and the player can fast-travel between stages instead of riding the entire route on horseback.
How treasure maps compare to other open-world collectibles
Treasure maps sit between two common open-world collectible types: the hard-coded map marker and the procedurally generated point of interest. The hard-coded marker is what most modern open-world games use for main missions, and it is invisible on the in-game map until the player accepts the quest. The procedurally generated point of interest is what most survival and crafting games use for resource nodes, and it appears on the in-game map as a generic icon. Treasure maps sit in the middle: the map is hand-placed, but the sub-marker is a hand-drawn sketch, and the dig site is a real landmark rather than a generic icon.
This middle position is what makes the system feel rewarding. A hard-coded marker tells the player exactly where to go, which removes the puzzle. A procedurally generated point of interest tells the player nothing, which removes the narrative. Treasure maps give the player a clue, a region, and a silhouette, which is enough to feel like a puzzle without feeling like a chore. The system is also fully readable from the in-game map, which means the player can plan a route before leaving camp and avoid the random wandering that most open-world collectibles encourage.
The trade-off is that the system does not scale. A hand-placed map is expensive to design, test, and balance, which is why the base game ships with a fixed number of maps rather than a procedural generator. For a single-player game with a finite world, that cost is worth paying. For a live-service game with an expanding world, the same design would not work without a generator, which is why most live-service games use the hard-coded marker pattern instead.
What the system teaches about reading the world
By the time a player has finished the high-stakes chain and most of the smaller maps, they have learned a specific skill: they have learned to read the world as a puzzle. The open world is full of small, unusual features that most players ignore on a first playthrough: a single broken tree on a hillside, a chimney without a house, a rock arch over a dry creek. Treasure maps teach the player to look for those features, because each one is a potential dig site. That habit carries over into the rest of the game, and it is one of the reasons the open world feels dense rather than empty.
The system also teaches the player to read clue art, which is a transferable skill. The same drawing logic appears in the game’s cigarette cards, the dreamcatchers, and the dinosaur bone locations. A player who has finished a few treasure maps will find the dinosaur bone hunt much easier, because the silhouettes are drawn the same way and the dig triggers work the same way. The system is, in that sense, a tutorial for several other side activities, and it is one of the few systems in the game that has a clear, visible payoff for reading the documentation.
Frequently asked questions
How many treasure maps are in Red Dead Redemption 2?
The base game ships with one high-stakes multi-stage chain and around a dozen smaller loot maps. The exact number depends on whether the player counts the maps found in stranger missions and the camp ledger as separate entries, but the practical answer is one long chain and roughly ten to twelve short maps that each pay out a single reward. The exact count can also vary slightly depending on whether the player has access to the special edition content, which adds a small number of bonus maps tied to gang hideouts.
Can treasure maps be missed permanently?
Yes, several maps are sold by NPCs and disappear from the merchant’s inventory once a chapter ends. A player who skips chapter two or three entirely can lose access to those maps. The high-stakes chain is more forgiving because its maps are found in the world rather than sold, but its early stages are also chapter-sensitive. The safe approach is to buy every map from every general store in chapter two or three, then solve them as the player explores, so the inventory is exhausted before the chapter transition.
What is the best single reward from the treasure map system?
The final gold bar from the high-stakes chain is the most valuable single reward, because it pays out $500 at a fence and can be sold at any time. The smaller maps often pay out unique clothing items or weapons, which are valuable to players building a specific look, but the gold bar is the cleanest answer for a player optimizing wealth. Players who care about cosmetic variety can argue for the unique hat or coat, but those items have no resale value, which makes the gold bar the most universally useful payout.
Do treasure maps work in Red Dead Online?
No, the treasure map system is single-player only. Red Dead Online uses a different reward structure, with daily challenges, role-specific missions, and a separate economy. Players who want the treasure-hunt loop in multiplayer have to play the single-player mode, and the closest multiplayer equivalent is the weekly collectible rotation, which works on a different timer and a different reward table.
Can two players solve the same hunt in co-op?
Red Dead Redemption 2 does not support co-op for treasure hunts. Each player has to inspect the map, ride to the landmark, and dig on their own. A second player can ride along, but only the player who inspects the map sees the sub-marker, and only the player who digs receives the reward. There is no shared progress and no shared reward, which means a co-op player has to repeat every hunt on their own save to unlock the same payouts.
What happens if the player inspects a map but never digs?
The map stays in the player’s satchel and the sub-marker stays on the in-game map. The player can solve the hunt at any later point, and the reward will be the same. There is no time limit and no penalty for delaying a dig, which is one of the more forgiving aspects of the system. A player who picks up a map in chapter two and solves it in chapter six will still receive the full reward, including the unique items and the gold bar payouts.
Are treasure map rewards affected by difficulty settings?
No, the rewards are fixed. A gold bar pays $500 at a fence on every difficulty level, and the unique items are the same regardless of the player’s chosen difficulty. Difficulty settings change combat and core economy, not the treasure map payout. The only difficulty-related change is that a player on a harder setting may take longer to reach a dig site, because the route is more likely to include random encounters, but the reward itself does not scale.
Do treasure map clues change between playthroughs?
No, the clues and dig sites are identical in every playthrough. The game does not randomize treasure map locations, which is why a written guide works for every player. This is a deliberate design choice, because the system is meant to teach the player to read clue art, not to test the player’s memory. A randomized system would shift the design toward recall rather than interpretation, and Rockstar clearly chose interpretation, which is the harder skill to teach.
What is the fastest way to farm treasure map rewards?
The fastest route is to buy every map from every general store in chapter two or three, then solve them in a single long ride. A player who optimizes the route can finish every short map in roughly two in-game hours, then return to the high-stakes chain for the final gold bar. The fence at Emerald Station is the best vendor for selling the rewards, because the fence price is consistent across the map and the station is close to several dig sites, which makes it a natural hub for a farming run.
Why are treasure maps considered good design in open-world games?
Treasure maps are considered good design because they turn exploration into a small, solvable puzzle. The player reads a clue, finds a landmark, and receives a reward, all without leaving the open world. The loop is short enough to fit into a single play session, the rewards are visible on the player’s gear or wallet, and the clues teach the player to read the environment. This is the same reason the system has been copied in many other open-world games: it is small, clean, and rewarding, and it scales across skill levels without changing the core loop.
Leave a Reply