
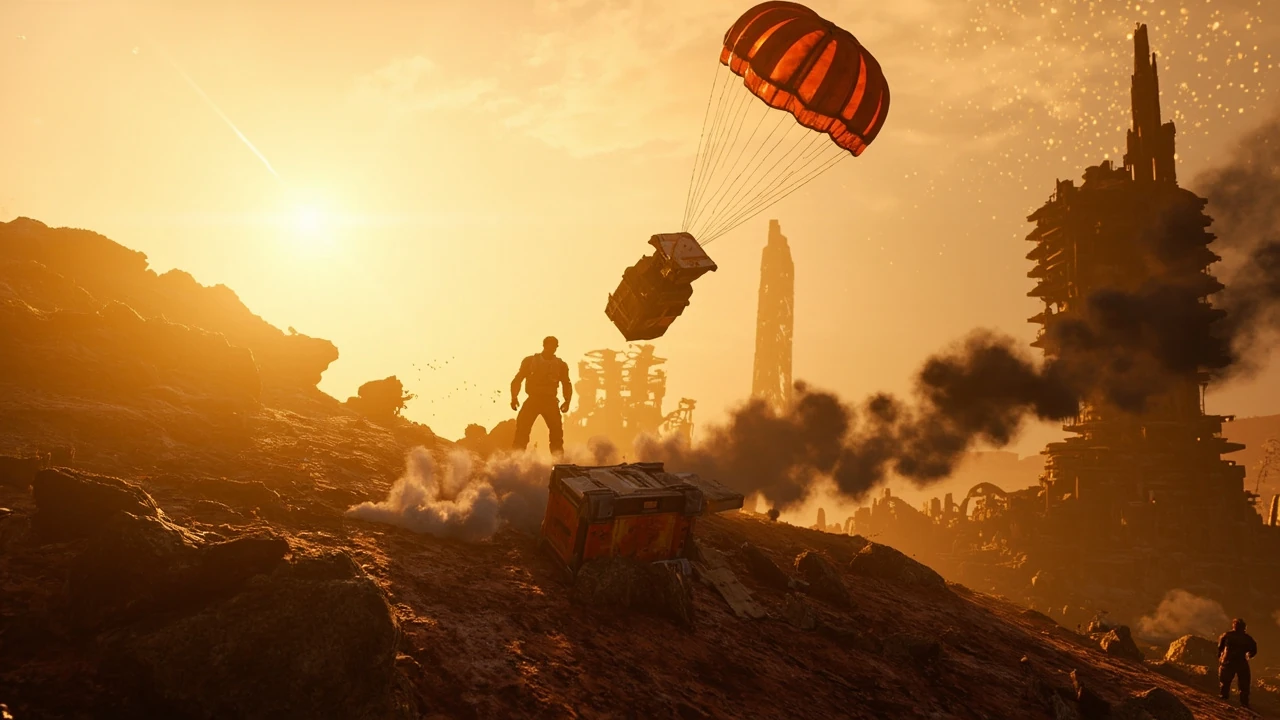
Supply drop arc raiders: what happens when the canister comes down
A supply drop in Arc Raiders is one of the loudest moments a raid can produce. The orbital track tilts, the ground shakes, and a reinforced canister swings down on a bright parachute into a contested patch of terrain. Every squad within a few hundred meters has a rough idea of where it will land. The loot is the obvious draw. The mechanic is less obvious, because the supply drop is the most heavily contested public event on the surface, and the system rewards route planning and patience over raw speed. This article walks through how the event behaves based on current preview reporting, what the crate tends to contain, and how a player or a squad can approach it without treating the raid as a coin flip.
The aim here is narrow: explain the supply drop mechanic, frame it inside the extraction loop, and flag the decisions that tend to end a run. Where hands-on reporting and previews support a claim, the source is named. Where the picture is still incomplete because the game is in development, that gap is stated rather than papered over.
How the supply drop works inside the extraction loop
Arc Raiders sits inside the extraction-shooter genre, so a session starts with players dropping to the surface, gathering what they can carry, and extracting at a fixed point before losing it. The supply drop is a public, world-level event that runs alongside that loop. It is not a separate mode and it is not a quest step. It is a scheduled delivery of sealed containers to a landing zone, and the surface reacts to it in real time.
From the public previews, the drop is initiated above the surface and is visible from a long distance. The canister is large, the parachute is brightly colored, and the descent path crosses open ground, which makes the trajectory easy to track. Once the container hits the surface, a fixed window opens during which any player in the match can approach, open, and loot it. After that window closes, the container is treated as ordinary world geometry, and the contents are gone.
The drop is timed, so the decision to chase it is a real one. A player can keep moving on a current scavenging route and finish the planned objectives, or detour toward the predicted impact zone and accept the risk of a fight. The drop is loud, so the area fills with other players and with ARC machines that also respond to the noise. The drop contents are not guaranteed to be the same in every match, so chasing one is always a probability call rather than a promise.
What a supply drop can contain
Public previews and developer commentary describe supply drop contents as a mix of higher-tier weapons, ammunition for the rarer weapon classes, healing and utility items, and crafting components that are awkward to find through normal scavenging. The exact contents table is not fully published because the game is still in active development, and the developers have said the loot pool can be tuned between test sessions. For planning purposes, categories are more useful than a memorized list.
| Content category | Why it sits in a supply drop | How it usually feels in a raid |
|---|---|---|
| High-tier weapons and weapon variants | Rare drops that surface during scavenging with low odds | Worth a detour if the current loadout is weak or if a specific build is being chased |
| Ammunition for uncommon weapon classes | Some ammo types are difficult to top up at a normal scavenging pace | Valuable in longer sessions where a stockpile has already been spent |
| Healing and utility items | Top-ups for med kits, shields, and stamina tools during a long raid | Useful but rarely the sole reason to chase a drop |
| Crafting components and mods | Materials that are awkward to source, especially in solo play | Good motivation when a specific craft or upgrade is in progress |
| Cosmetic and event items | Limited drops tied to current seasons or playtests | Bonus value rather than the core reason to engage |
The most useful framing is to assume that a drop is worth more than a single point of interest and less than a guaranteed win. It is a chance to upgrade a raid mid-session, not a payout for showing up.
Reading the map before committing to a drop
Most of the value of a supply drop comes from the decision made before the canister hits the ground. By the time the container is on the surface, a large part of the advantage has been lost, because anyone near the impact zone has the same information. A working rule is to treat the drop as a route, not a destination.
Start by checking the orbital track angle if the surface map shows it. The drop path crosses the map on a line, and the predicted impact zone sits at the end of that line. Knowing the impact zone is only the first step. The second step is to identify two or three positions that are close enough to reach quickly but far enough to keep the player out of the open when the canister lands. Rocky outcrops, ridges, and ruins tend to work well because they give sight lines onto the impact crater without placing the player in the center of it.
Player density near the impact zone is worth reading before committing. In a squad, the risk can be spread by sending one player to scout while the rest hold a fallback position. In solo play, a conservative move is to arrive early, observe the area for thirty seconds to a minute, and let the first wave of players commit before pushing in. That sounds passive, but it is often the difference between an upgrade and an early extraction failure.
The role of ARC machines in a drop
ARC machines are drawn to a supply drop, and that is the detail that catches a lot of new players off guard. The machines in Arc Raiders are persistent world threats that patrol fixed regions and react to noise, and a falling canister is one of the loudest events on the surface. When a drop is pushed, the contest is not only against other players. The local machines have also decided to investigate the area.
That has practical consequences. A quiet approach is rarely possible once the canister is in the air, because the machines tend to be on the move by the time the drop lands. A coordinated squad can use that attention as a tool: the machines can act as a third party against a rival squad that is also pushing the drop, because the machines do not distinguish between factions. The area around an active drop is also one of the places where a careful solo player can use the environment to escape a losing fight, because the machines will continue to fire on anyone who is loud, including the player who just won the duel.
Learning the patrol patterns of the machines near the locations a player tends to run is more valuable than memorizing a single drop site. A drop in a low-traffic area can feel almost peaceful compared to a drop in a machine-dense area, and the cost of getting it wrong is the same in both cases.
Solo play versus squad play around a drop
The supply drop is one of the few mechanics in Arc Raiders that genuinely changes between solo and squad play. The mechanics of the drop itself are the same, but the calculus around it shifts because rewards are shared in a squad and risks are also shared.
| Factor | Solo play | Squad play |
|---|---|---|
| Reward share | You keep the full contents if you extract | Contents split between squadmates, which dilutes each individual upgrade |
| Engagement risk | Every fight is one-on-many with limited recovery options | You can choose to engage or to let another squad fight first |
| Information | You have only your own eyes and ears | One player can scout while the others hold a fallback position |
| Machine threat | A single machine patrol can end a run | The squad can focus fire or pull machines away from the impact zone |
| Best reason to chase | You need a specific component or weapon to finish a build | The squad has a coordinated plan and an extraction point already set |
For solo players, the safest pattern is to treat the drop as a backup plan rather than a primary objective. Move toward the impact zone only if the current route already takes the player close, and only if they are willing to extract from a different point if a fight goes wrong. For squad players, the drop is a higher-value target because the squad can absorb a single bad engagement, but it also requires more communication: who is scouting, who is watching the flanks, and who calls the extract.
Common mistakes around a supply drop
Most supply drop failures are not caused by bad aim or bad gear. They are caused by decisions that put the player in the worst possible position when the canister actually lands. A short list of the most common mistakes helps a new player avoid the worst of them.
- Chasing a drop across open ground at the last second, which turns a route decision into a sprint and removes the option to back off.
- Fighting the first squad seen at the drop instead of using terrain to reposition.
- Forgetting that ARC machines are also drawn to the noise, and ending a raid to a patrol that was never planned for.
- Opening the drop while still under fire, which leaves no time to sort through contents and choose what to carry out.
- Overloading the inventory with drop contents and then failing to extract because the run is now too heavy to move.
The first two items are the most common, and they share a single root cause: arriving at the drop with no plan for what to do if someone else is already there. A good plan is rarely about being faster. It is about being in a position where fighting or leaving is both an option.
The supply drop inside a typical raid loop
To make the system concrete, it helps to walk through a single raid with a focus on the moments where the supply drop changes the decision tree. The example is built from public preview information rather than any developer-confirmed route, so it should be read as an illustration of the mechanic rather than a prescribed path.
- Start at a drop pod and pick a landing zone based on the current objective and the predicted drop path.
- Complete two or three scavenging loops to build a base loadout, including a healing item and a long-range weapon if possible.
- Check the orbital track for the upcoming drop. If the impact zone is close to the current route, plan to be in a fallback position before the canister is in the air.
- When the drop begins its descent, stop moving, identify a piece of cover, and observe the area for a minute.
- Push the drop only if the coast is clear or if there is a clear advantage over the other players in the area.
- Open the container, prioritize the items that fit the current build, and leave the rest if the inventory is already heavy.
- Move to the closest extraction point that is not directly under the drop, because the area around the crater stays hot for several minutes after the drop.
- If a squad is contesting the drop, consider a quiet rotation to a different extraction rather than a direct fight, especially in solo play.
The pattern that matters is that the drop is a midpoint event. It does not start the raid, and it does not end the raid. It sits in the middle of the loop, and the best players treat it as a way to upgrade the second half of a session rather than as the reason to start one.
How the supply drop compares with other loot events
Arc Raiders is not the only game with public loot events, and the supply drop sits inside a wider design space. Comparing it to the closest analogues clarifies what makes it distinctive and where instincts from other games can mislead.
| Mechanic | Game | Behavior | What it teaches the player |
|---|---|---|---|
| Supply drop | Arc Raiders | Public, timed, noisy, contested by players and machines | Reward comes from preparation and route choice, not from sprinting to the crate |
| Airdrop | Battle-royale titles | Public, mid-to-late game, high-tier loot | Risk grows as the circle shrinks, so timing matters more than the initial push |
| High-value target | Various extraction shooters | Designated enemy or objective with a fixed reward | The reward is known in advance, so the engagement is a direct fight |
| World event | Open-world survival games | Time-limited activity that reshapes nearby enemies | Events redirect the map, not just the loot pool |
The key difference is the role of the environment. In a battle-royale airdrop, the relevant threats are other players. In Arc Raiders, the relevant threats are the visible players, the players who are not visible, and the local ARC machines that are also drawn to the noise. That third category is what makes the supply drop feel less like a loot box and more like a pressure event on the surface.
Reading the orbital track and predicting the impact zone
One practical skill that pays off in almost every match is reading the orbital track to predict where the next supply drop will land. The track is not random. It follows a path that crosses the map, and the impact zone is the point where the canister detaches and falls. The game informs players about the title through standard surface channels, and the ARC Raiders entry on Wikipedia gives a useful overview of the broader context for how the extraction loop is described publicly. For additional context, As a hands-on preview of Arc Raiders notes, the track is shown as a line on the surface map, and a careful player can use that line to plan a route in advance, which is also why many early impressions from outlets such as Game Informer emphasize the track as a planning tool rather than a spectacle.
The useful mental model is to imagine the track as a moving line that crosses the map over time, and the impact zone as a point near the end of the line at the moment the drop begins. If that point is identified early, the player can route toward a piece of high ground that overlooks it without crossing the impact zone itself. That is the geometry that wins supply drops: not the fastest approach, but the cleanest sight line onto the area where the action will happen.
Inventory and loadout decisions around a drop
The other decision that is easy to underweight is what to carry into and out of a supply drop. Inventory space in Arc Raiders is a real constraint, and a player who arrives at a drop with a full backpack cannot make the most of the contents. The right approach is to think about the drop as a swap: the items that are not needed should be left at a safe spot before the push, and the items picked up should fit into a build that has already been planned.
- Drop low-value healing items at a stash before pushing, because the drop is more likely to contain rare healing than a normal scavenging run.
- Keep at least one open weapon slot if a specific high-tier weapon is being chased, because finding the weapon and having no slot for it is a common failure mode.
- Carry a long-range and a close-range weapon, because drops tend to draw a mix of engagements from a distance and at close quarters.
- Use a quiet approach for the last fifty meters, because sprinting into the impact crater telegraphs position to every other player in the area.
- Plan the extraction inventory in advance, including the worst case where the best item has to be left behind to extract safely.
That last point is the one that experienced players emphasize. The drop is a chance to upgrade the raid, but the raid is only a success if the player extracts. Walking out of the drop with a full inventory of rare items and no extraction plan has not won the drop. It has just moved the failure forward by a few minutes.
What is still unknown about the supply drop
It is worth being clear about what is not yet confirmed in public sources. The exact contents table, the precise drop schedule, the conditions under which a drop can fail, and the rules around squads sharing contents are all areas where the developers have described the system in general terms but have not published a full reference. Some of that information will arrive with the game’s launch and the public release of the official documentation, and some of it will only be learned through play.
The honest framing is to treat the supply drop as a high-variance, high-reward event whose details are still being tuned. The patterns described in this article are drawn from public previews and from the design language of the genre, and they are meant to be useful even if a specific number changes between seasons. If a number does change, the most reliable source is the official patch notes and the developer’s own documentation, both of which should be checked before committing to a specific build or strategy.
Practicing the supply drop without burning a raid
New players often burn their first few raids chasing drops they were not ready for. A simpler path is to use the early raids to learn the map and the machine patrols, and to treat the supply drop as a low-priority detour until the rest of the loop feels stable. Once the rest of the loop is stable, the drop becomes a way to accelerate a build rather than a way to learn the game.
One useful exercise is to spend an entire raid avoiding every drop. That sounds counterintuitive, but it teaches two things: how to read the surface without chasing the loudest event on it, and how to extract with a steady, mid-tier loadout that is more reliable than a high-variance drop run. The next step is to spend a raid pushing only the closest drop, with a quiet approach and a clear extraction point. The third step is to push a drop in a squad, where the failure modes are different and the communication load is higher.
That progression is the same one that experienced players use in other extraction shooters, and it is a better teacher than any single guide. The drop is a system that rewards repetition, and the more matches are played around it, the easier it is to read.
Short checklist before pushing a drop
If only a few things are remembered from this article, the checklist is the part to keep. It is the distillation of the patterns above into a short set of pre-flight checks that apply in almost any raid.
- Identify the impact zone on the surface map before the drop begins, not after.
- Pick a fallback position that overlooks the impact zone from cover, not from the open ground around it.
- Confirm that the area is not in the middle of an active ARC machine patrol, or plan to handle the patrol first.
- Empty at least one weapon slot and a meaningful portion of the inventory before pushing.
- Identify the closest extraction point that is not directly under the drop, and decide in advance which one will be used.
- Push only after the area has been quiet for at least thirty seconds, or after a rival squad has already committed and a clear advantage is in hand.
- Sort the contents at the crate, not in the open, because the inventory screen leaves the player exposed for longer than expected.
- Extract before the second wave of players arrives at the crater, because the drop stays hot for several minutes after it lands.
None of these checks are exotic. They are the same patterns that experienced players use in other extraction shooters, and they are the patterns that the public reporting on Arc Raiders has been quietly emphasizing. The system rewards them, and it punishes the players who skip them.
How the supply drop connects to the wider Arc Raiders design
The supply drop is best understood as one piece of a larger design philosophy. Arc Raiders puts a lot of weight on information: where the drop is going to land, which players are nearby, which machines are patrolling, and which extraction points are still open. The drop is the loudest signal on the surface, and it is also the moment when the information economy becomes most valuable. Players who read the surface well extract more often. Players who only react to the loudest signal end up feeding the next player’s run.
That is also why the system is worth a long article rather than a one-paragraph tip. The supply drop is the part of Arc Raiders where the genre’s instincts and the game’s own design language come together. A player who learns to read it well will also learn to read the rest of the surface, because the same skills apply to every other event in the game.
Frequently asked questions
What is a supply drop in Arc Raiders?
A supply drop is a timed, public event in which an orbital canister descends onto the surface on a bright parachute and lands at a fixed point on the map. Any player in the match can approach and open the container during a window after the impact, and the contents are removed from the world when the window closes or the crate is looted.
Where does the supply drop land?
The drop follows the orbital track, which is shown on the surface map. The canister detaches near the end of the track and falls toward a predicted impact zone, so a careful player can read the map and route toward a piece of high ground that overlooks the area before the drop begins.
What does a supply drop usually contain?
Public reporting describes the contents as a mix of high-tier weapons, ammunition for uncommon weapon classes, healing and utility items, and crafting components. The exact contents table can change between seasons and test sessions, so the categories above are the most reliable framing rather than a fixed list.
Is the supply drop worth chasing in solo play?
It can be, but only if the drop is on the player’s existing route and the player has a clear fallback position. Solo players should treat the drop as an upgrade to a planned run rather than the reason to start one, and they should always have a backup extraction point in case the area becomes too contested.
Do ARC machines react to a supply drop?
Yes. The machines in Arc Raiders are drawn to noise, and a falling canister is one of the loudest events on the surface. Players pushing a drop should expect local machines to investigate, and should plan their approach around that fact rather than treating the drop as a fight only against other players.
Can a squad share the contents of a supply drop?
Squads can divide the contents of a drop between their members, but the exact rules around sharing and the limits of each player’s inventory are part of the broader extraction loop and are still being tuned in current playtests. Squad players should plan the division before the drop lands to avoid a slow, exposed inventory screen at the crater.
How long does a supply drop stay on the surface?
Public previews describe a fixed window during which the container can be opened. After the window closes, the container is treated as ordinary world geometry. Players who arrive late should not expect the contents to be available, and should plan around the original drop time rather than the current one.
Is the supply drop the same in every region of the map?
The mechanics are the same, but the difficulty of a given drop changes with the terrain, the local machine patrols, and the typical player traffic in the area. A drop in a quiet region is a low-risk upgrade, while a drop in a machine-dense and player-dense region is one of the highest-risk events in the game.
What is the best way to practice the supply drop?
Use the first few raids to learn the map and the machine patrols, and to extract reliably without chasing drops. Once the loop feels stable, start with the closest drop and a quiet approach, then progress to squad play. The drop rewards repetition, and the more matches are played around it, the easier it is to read.
Where can I read more about Arc Raiders and the supply drop?
Public previews from outlets that have had hands-on time with the game describe the supply drop in detail, and the official developer documentation is the most reliable source for numbers that change between seasons. Hands-on previews are a good way to read about the system in motion, and the game’s reference pages are a useful starting point for the broader context.
Leave a Reply