
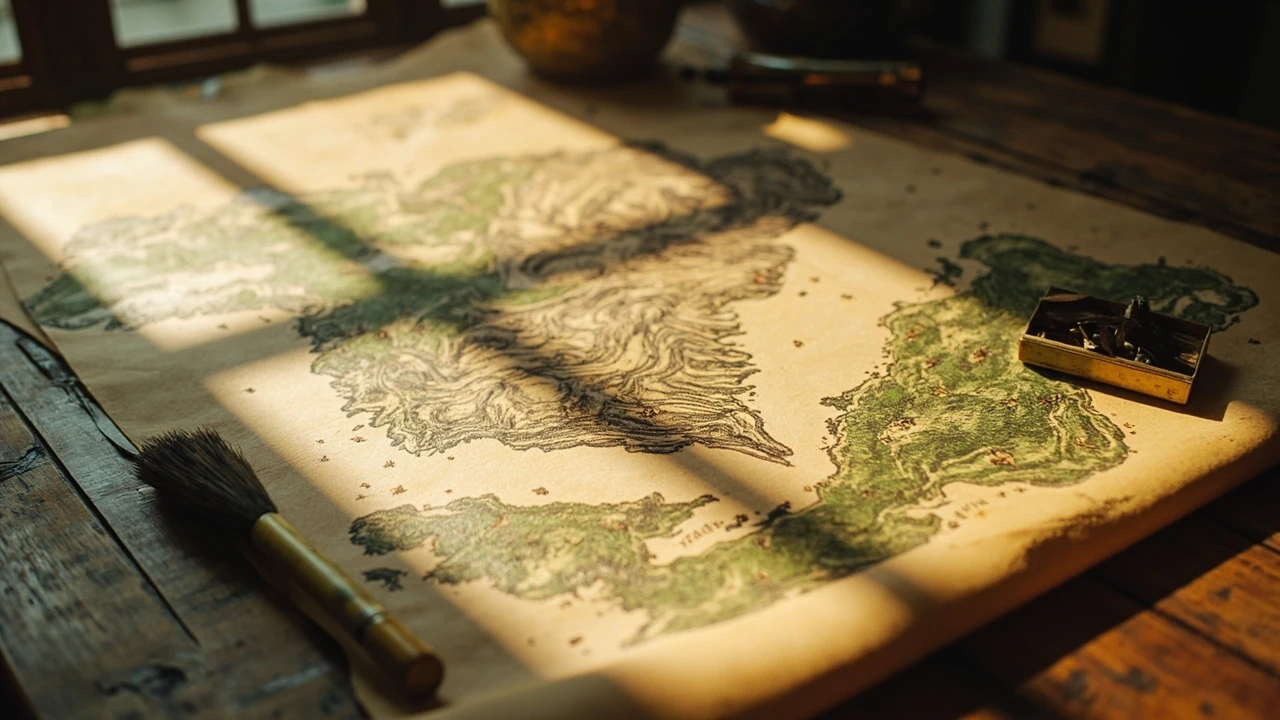
Ghost of Yotei map: regions, biomes, and how the open world is laid out
The ghost of yotei map covers the entire island of Ezo, the historical setting for Sucker Punch Productions’ open-world action game Ghost of Yōtei. Rather than a single continuous sandbox, the world is divided into several large regions that radiate outward from Mount Yōtei, the dormant volcano that gives the game its name. Each region has its own biome, settlement clusters, quest density, and elevation profile, which means that reading the map is less about memorizing waypoints and more about understanding how the geography shapes the moment-to-moment gameplay loop.
This guide focuses on what a player actually sees when they open the in-game map screen, how the regions differ from one another, where fast travel is available, and how the fog-of-war reveal system is designed to support exploration without making backtracking punishing. The information is written for the released version of the game on PlayStation 5 and reflects only the systems that are part of the public build, not datamined or rumored content.
The shape of Ezo: how the world is divided
Ezo is the historical name for the lands north of the Matsumae domain, and Ghost of Yōtei treats it as a single large landmass with internal borders rather than a chain of separate maps stitched together. When you first open the map, the screen is dominated by a stylized top-down view of the island, with Mount Yōtei near the center and the coastline running along the outer edge. The regions are not marked by hard walls or loading screens; instead, they are signposted by changes in elevation, vegetation, architecture, and the type of content that spawns in each area.
Sucker Punch has described the design intent in post-launch interviews as a world that should feel like a continuous landscape first and a collection of zones second. That decision is visible in the map layout, because the same road can pass through two named regions without an obvious boundary, and the minimap gradually introduces new icons as you cross from one area to the next instead of swapping the entire UI on a line.
Core regions and their identifying features
Six regions are consistently named across the game’s UI, marketing, and supporting documentation. The list below describes each region as it appears on the map, including the dominant biome and the kind of content you can expect to find there. Regional names are taken from the in-game map labels and the published materials around the title.
- Yōtei foothills: the lowlands around the central volcano. Mixed farmland, river valleys, and the densest cluster of villages. This is where most of the early-game story beats take place.
- Ishikari plain: broad grasslands to the north, crossed by long sight lines and dotted with hunting camps. Expect wide vistas, fewer cliffs, and more open combat encounters.
- Teshio river coast: the northwestern coastline, with cliffs, sea stacks, and fishing settlements. Vertical terrain dominates and shrines are often tucked into the headlands.
- Tokachi wilds: a dense, mountainous interior with heavy forest cover. Travel here is slower on foot, but the region holds many of the game’s hidden bamboo strikes and hidden altars.
- Nemuro frontier: the eastern peninsula, the most remote part of the map. Cold climate, snowy ridges, and a higher density of mythic quest content.
- Kunashir reach: the southern islands and sea lanes, reached mostly by boat. Smaller landmass, but with its own self-contained set of activities and a distinct visual palette.
These regions are not equal in area. The Yōtei foothills and the Tokachi wilds each take up a large portion of the central map, while the Kunashir reach is intentionally compact and is designed to be visited later in the campaign. A useful mental model is to think of Ezo as a rough hexagon with a volcano at the center, three mainland regions radiating outward, two peninsular regions on opposite coasts, and one island chain to the south.
Reading the map screen
The map screen is the player’s primary spatial interface, and understanding its layers saves a lot of time in the field. The screen is organized into several visual bands, and each band can be toggled on or off depending on what you are looking for.
The base layer is the terrain itself: contour lines for elevation, painted colors for biome, and a few hand-drawn symbols for major landmarks such as Mount Yōtei’s peak, large lakes, and the coastline. On top of that, the map draws icons for points of interest, which fall into a handful of recognizable families. The shape of an icon tells you the type of location, and the color of an icon tells you its current state in your save file.
Map icons and what they mean
Once you have explored a portion of a region, the map fills in detail. The following table summarizes the icon families that appear on the ghost of yotei map and the kind of activity they correspond to in gameplay.
| Icon family | What it represents | Typical interaction |
|---|---|---|
| Settlement marker | Villages, inns, and friendly camps | Buy supplies, accept side quests, rest, change equipment loadouts |
| Shrine marker | Inari and other small shrines | Offer prayers, receive minor rewards, fast travel anchor |
| Bamboo strike marker | Training bamboo groves | Timing-based combat challenges for technique points |
| Hidden altar marker | Sword-in-stone style monuments | Environmental puzzle, often a short platforming sequence |
| Hot spring marker | Outdoor onsen locations | Recover health, unlock cosmetic customization options |
| Question mark marker | Undiscovered point of interest | Revealed only after you get within proximity in the open world |
| Danger marker | Enemy camp, ambush site, or bounty target | Combat encounter with a known reward tier |
The color of an icon is just as important as the shape. White icons mean the location is known but not yet visited in full. Blue icons are completed, whether that means the side quest is turned in, the bamboo strike is cleared, or the shrine has been activated. Red icons are active threats, such as a bounty target still in the area or a Mongol raid that has not been resolved. Tracking the color of the icons is often the fastest way to estimate how much of a region is left to explore.
Fog of war and how the map reveals
Ghost of Yōtei uses a layered reveal system instead of a single hard fog-of-war layer. The first time you enter a new subregion, the map screen for that area is greyed out, and you see only the outline of the coastline and a rough elevation profile. As you move through the landscape on horseback or on foot, the map resolves itself in two stages. First, the terrain becomes sharper: ridges, river paths, and the silhouettes of major landmarks become visible. Second, points of interest begin to populate as you come within a set radius of each location, which is typically just under a hundred meters in open terrain and considerably less inside a town.
This staged reveal has a practical effect on how you should plan a route. Long sight lines along ridgelines and the tops of cliffs are extremely efficient for revealing new map, because a single vantage point can uncover a wide swathe of terrain at once. Sticking to the road network is safer but reveals the map more slowly, because the road often runs through valleys and tree cover where you cannot see far in any direction. Players who want to fill out the map quickly tend to climb to high ground first, then descend to clear the icon clusters they spotted from above.
Fast travel and the shrine network
Fast travel is handled through the shrine network and through a small number of inns. You cannot fast travel from anywhere on the map, which is a deliberate design choice that keeps traversal interesting and rewards players for planning ahead. The map screen shows which shrines are currently active as fast travel anchors, and which ones still need to be discovered before they can be used.
To unlock a shrine as a fast travel point, you usually need to pray at the shrine itself. The interaction is short, and it does not consume any resource, but the act of visiting each shrine is what makes the rest of the map manageable later. Once a shrine is unlocked, you can open the map, hover over its icon, and pay a small coin fee to fast travel directly to that location, provided you are not in the middle of a combat encounter or carrying an item that triggers a quest-related restriction.
The Kunashir reach and the Nemuro frontier have fewer shrines than the central regions, so the cost of moving around those areas is higher on foot. Planning to clear a chain of quests in a single sweep, rather than bouncing back to a hub after every encounter, is more efficient once you leave the foothills.
Map filters and how to use them
One of the most useful quality-of-life features on the ghost of yotei map is the filter system. Rather than a single cluttered view, the map offers several filter presets that hide everything except a chosen category of icon. Filters are toggled individually, so you can also combine them if you want to look for, say, only bamboo strikes that are still uncompleted within a given region.
The default filter set shows everything that is discovered. A more focused set, which is the one experienced players tend to use, hides completed content entirely. That single toggle turns the map into a checklist of what is still left to do in each region, which is helpful when you are looking for a specific objective type without having to read every label on the screen.
How map density compares between regions
Not every region has the same density of content per square kilometer, and that difference is visible on the map once you have explored for a few hours. The table below is a qualitative summary of how the regions compare in terms of the content types most players care about, based on the patterns observed in the released build.
| Region | Combat camps | Bamboo strikes | Hidden altars | Hot springs | Travel density |
|---|---|---|---|---|---|
| Yōtei foothills | High | Medium | Medium | Low | Very high |
| Ishikari plain | High | High | Low | Low | High |
| Teshio river coast | Medium | Low | High | Medium | Medium |
| Tokachi wilds | Medium | High | High | Medium | Low |
| Nemuro frontier | Medium | Medium | Medium | High | Low |
| Kunashir reach | Low | Low | Medium | High | Very low |
A useful rule of thumb is that the central regions give you the most content per unit of travel time, while the coastal and frontier regions require more planning because the density is lower and the travel distances between points are longer. If you are playing for completion, a common path is to sweep the foothills and the Ishikari plain first, then push outward to the coast and frontier regions in a single long expedition so that you do not waste fast travel on long return trips.
Mount Yōtei as a navigation landmark
Mount Yōtei is the visual anchor of the entire map. The peak is visible from almost every other region, weather permitting, which means that you can use it as a compass even when your minimap is cluttered or your objective is set to a distant point. The peak is roughly in the center of the island, so if you can see it on the horizon, you can orient yourself by noting where the peak is in relation to your current position.
This is more useful than it sounds. In dense forest regions like the Tokachi wilds, the tree canopy can hide everything beyond a few dozen meters, and the minimap can feel hard to parse when every direction looks similar. A quick glance at the peak, then a glance at the map, is enough to confirm whether you are heading toward the center of the island or away from it, and that single piece of information often resolves the question of which valley to take at a fork.
How the map changes during the story
The ghost of yotei map is not static. Certain regions change in appearance as the story progresses, and those changes are reflected on the map screen in addition to the open world. The most consistent change is the appearance and disappearance of enemy icons along the roads, which mirrors the in-game ebb and flow of Mongol presence in different parts of Ezo. If you have a story quest that targets a particular region, the map often adds a temporary waypoint in that region even before the quest is accepted, as a hint that the area is about to become relevant.
There are also a small number of locations that only appear on the map once a specific story condition is met. They tend to be added automatically, rather than requiring you to discover them in the field, but they are flagged with a different color so that you can tell them apart from icons that have been there since the start of the game.
Horse traversal and the mounted map
Your horse is the most reliable way to cross long distances on the map, and the game is tuned so that most journeys between two discovered shrines are quick enough to make backtracking practical. The mounted map view is essentially the same as the on-foot map, but it adds a small compass strip at the top of the screen that points toward your current objective. The compass strip is unobtrusive enough that you can ignore it during free exploration, and detailed enough that you can follow it through a town without opening the full map screen.
On horseback, the map also updates faster than on foot, because your discovery radius is effectively larger when you are moving quickly. That is one reason why experienced players tend to clear the open plains on horseback first, then switch to on-foot exploration once the terrain gets too narrow for the horse to keep up.
Map etiquette for cooperative sessions
Ghost of Yōtei does not include a traditional online co-op mode, but the save system and the way the map records progress matter for anyone who shares a console. Each user profile maintains its own map state, which means that exploration does not transfer between profiles by default. If two players share a console, the map for the second profile starts blank, even if the first profile has already discovered the entire island. The map state for each profile is tied to the save file, so as long as you load the correct profile, your map progress is preserved.
For households that share a console, the practical implication is simple: if you want a map that reflects all the exploration done in the household, you need to play on the same profile. Otherwise, the two profiles will diverge, and the map for the less-played profile will look sparse even if the world is identical.
Common map mistakes and how to avoid them
A few recurring mistakes show up in the way new players interact with the map, especially in the first dozen hours. None of them are bugs, but they can make the open world feel more confusing than it needs to be.
- Skipping shrines to save time. Walking past a shrine instead of praying at it means you cannot use it as a fast travel point later, which is far slower than the few seconds it takes to pray.
- Ignoring the question mark icons. They are the game’s way of pointing at content you have not yet discovered, and the radius for revealing them is generous, but it is not unlimited.
- Confusing red and white icons. Red is a live threat, white is a known but unresolved location. They look similar at a glance, but they require different responses.
- Fast traveling into a fight. Some shrine anchors are inside contested areas, and arriving mid-encounter disables fast travel until the combat is over.
- Relying only on the minimap. The minimap is great for immediate direction, but it does not show elevation or distant terrain. The full map is the only view that captures the shape of the regions.
Working around these mistakes is straightforward once you know about them, but the cost of learning them the hard way is dozens of minutes of unnecessary backtracking across the largest regions.
Working with the world design: map and level flow
From a game design standpoint, the ghost of yotei map reflects a deliberate shift from the level-based structure of the earlier Ghost of Tsushima to a more open layout. The older game relied on a smaller island with more obviously carved zones, while Ghost of Yōtei uses a larger, more continuous landscape with internal variation instead of hard borders. That choice has consequences for the player, and they are visible on the map.
One of the consequences is that the game’s pacing is more dependent on elevation and weather than on linear progression. A single ridge can separate a beginner-friendly area from a high-difficulty one, and the map does not always telegraph that difference. The contour shading on the full map screen is the best way to anticipate it, because sharper contour lines mean steeper terrain, which in this game often means harder ambushes and more vertical platforming challenges. Reading the contour lines is essentially reading the difficulty gradient.
How a producer’s role shapes the in-game map
It is also worth noting that the production side of building a map like this is non-trivial. A producer working on a project of this scale coordinates the level design, art, and engineering teams to make sure that the world reads as a single space even though it is built out of many streaming chunks. The Digipen showcase on the subject of producing the open-world journey offers a useful window into how the non-linear structure of Ezo was planned, blocked, and stitched together, and the way the final map is laid out reflects that planning. Producers on a project like this one are responsible for keeping the level design’s region boundaries aligned with the art team’s biome targets and the engineering team’s streaming budget, and the fact that the player experiences the map as a single coherent world is the result of that coordination.
Comparing the ghost of yotei map to similar open worlds
Players coming from other open-world action games will notice both similarities and differences. The shrine-based fast travel is similar in spirit to the shrine network in The Legend of Zelda: Breath of the Wild, but the icon-heavy map screen is closer to the style of The Witcher 3 or Assassin’s Creed. The combination of the two is one of the more interesting parts of the design, because the two systems cover each other’s weaknesses. The full map screen gives you a strategic overview when you are planning a route, while the shrine network gives you tactical shortcuts when you are in the middle of a quest.
Compared to Ghost of Tsushima, the new map is larger and more varied, and it leans more heavily on the player to read the terrain rather than to follow a guided waypoint. That is a meaningful shift in design philosophy, and it changes the way the map is meant to be used. In the older game, the map was a useful secondary tool. In Ghost of Yōtei, the map is closer to a primary tool that you consult constantly rather than only when you are lost.
Map, regions, and the story arc
The story is also organized geographically, in a way that the map screen makes more obvious the longer you play. The early chapters concentrate in the Yōtei foothills, with forays into the Ishikari plain. The mid-game opens up the Teshio river coast and the Tokachi wilds. The late game and the post-game content are concentrated in the Nemuro frontier and the Kunashir reach. This is a fairly common pattern for open-world games, and the map reflects it by gating the higher-tier rewards behind travel to the more remote regions.
For a first playthrough, a useful plan is to follow the story from region to region rather than trying to clear a region completely before moving on. The reason is that some late-game activities depend on techniques and equipment that are not available in the early chapters, and the map makes that dependency clearer than the quest log does. Once the main story is complete, it is reasonable to circle back to the central regions and clean up the remaining content, because by that point the tools you need are all available.
Tips for efficient exploration
Putting the previous sections together, a few practical tips tend to make the most difference in how quickly the map can be filled in.
- Climb first, sweep second. Pick a high point, scan the area from the top, then descend in the direction with the densest cluster of unresolved icons.
- Pray at every shrine you pass. Even a shrine in a region you do not plan to revisit can save ten minutes of travel later in the game.
- Use the filter to clean up the map. Hiding completed content makes the remaining icons easier to read at a glance.
- Treat Mount Yōtei as a compass. When the minimap is hard to read, a quick glance at the peak on the horizon can reorient you faster than reading a label.
- Plan long expeditions outward, not inward. Combine multiple objectives in a remote region into a single trip rather than bouncing back to a central shrine between them.
None of these tips require advanced techniques or specific equipment. They rely only on reading the map correctly and on understanding how the reveal and fast travel systems interact.
What the map does not tell you
It is worth being honest about the limits of the map screen. It does not surface every piece of content in the world. Some encounters, including certain mythic tales and a small number of bounty targets, are only available under specific weather or time-of-day conditions, and the map does not show that state information. A location that is empty at midday can be active at night, and the icon will not change to reflect that.
The map also does not communicate the difficulty of an encounter. A red danger icon tells you there is a fight, but not how hard the fight will be, and there is no tooltip that lists the expected enemy level. The only way to know is to engage, and the only way to prepare is to read the situation in the field, which is part of the design intent of the open-world structure.
Final notes on reading the world
The ghost of yotei map is best understood as a layered document rather than a single image. The terrain layer tells you where you can go, the icon layer tells you what is worth doing, the filter layer tells you what is still left, and the contour shading tells you how difficult the route will be. Once each layer is read separately, the map becomes a practical tool for planning a session, rather than a confusing collage of symbols.
For a developer or designer reading this as a case study, the most interesting aspect of the map is how few systems it actually contains. The same handful of icon families, the same reveal radius, the same shrine anchor, and the same contour shading are reused across all six regions. That economy of systems is what makes the world feel coherent, and it is what allows the map screen to scale up to a larger island without becoming unreadable.
If you want a single piece of advice to take into a fresh save file, it is this: open the map, hide the completed icons, glance at Mount Yōtei to get your bearings, and then pick the nearest unresolved cluster. That small routine captures the way the map is meant to be used, and it scales from the first hour of the game to the last.
Frequently asked questions
How many regions are on the ghost of yotei map?
There are six named regions in the released version of the game: the Yōtei foothills, the Ishikari plain, the Teshio river coast, the Tokachi wilds, the Nemuro frontier, and the Kunashir reach. The boundaries between them are drawn by biome and elevation rather than by hard walls, and the same road can pass through more than one region without a loading screen.
Can you fast travel from anywhere on the map?
No. Fast travel is limited to discovered shrines and to a small number of inns. To use a shrine as a fast travel point, you have to pray at it in person, and you cannot fast travel while you are in active combat or carrying a quest-restricted item. The fee per fast travel is small, but the requirement to discover the shrine first is the main constraint.
What does a red icon on the map mean?
A red icon indicates a live threat in the area, such as an enemy camp, an ambush site, or a bounty target. Red is a state, not a type, so a red camp icon means the camp is currently occupied and the encounter is still available, while a blue camp icon means the camp has been cleared.
Does the map change during the story?
Yes. The map updates as the story progresses, both in terms of which regions become accessible and in terms of which icons appear or disappear. Some late-game locations are added to the map only after a specific story condition is met, and several enemy camps are added or removed based on the in-game state of the Mongol presence in each region.
Is the ghost of yotei map bigger than the map in Ghost of Tsushima?
Yes. Ghost of Yōtei covers a larger landmass with more regional variation than its predecessor. The new map also leans more heavily on internal elevation changes and weather effects, rather than on the more obviously zoned layout of the earlier game.
What is the fastest way to reveal new map?
Climbing to a high vantage point is the most efficient way to reveal new territory, because the discovery radius around your character is large enough to uncover a wide area from a ridge. Following roads reveals the map more slowly, because the road usually runs through valleys where the sight lines are short.
Do map icons differ between regions?
The icon families are the same across all regions, but the density of each family varies. For example, the Tokachi wilds have a high density of bamboo strikes and hidden altars, while the Kunashir reach has a high density of hot springs and a relatively small number of combat camps. The variety in density is one of the ways the regions feel different from one another.
Can you customize what the map shows?
Yes. The map screen has a filter system that lets you toggle individual icon families on and off, and it also offers a preset that hides completed content. The filter is a quality-of-life feature that becomes more useful the larger your save file grows, because it keeps the screen readable even when most of the world is already discovered.
Does the map carry over between profiles on the same console?
No. Each user profile has its own map state, and exploration does not transfer between profiles by default. If two players share a console, the second profile will start with a blank map even if the first profile has already discovered the entire island.
Where can I read about how the world was designed?
The official approach to producing the open-world journey is documented in a Digipen showcase on the game’s production, and the broader design context of the title is also covered in the public materials on the game itself. Both are useful background reading for anyone who wants to understand how the map on screen reflects the planning behind it.
Leave a Reply