
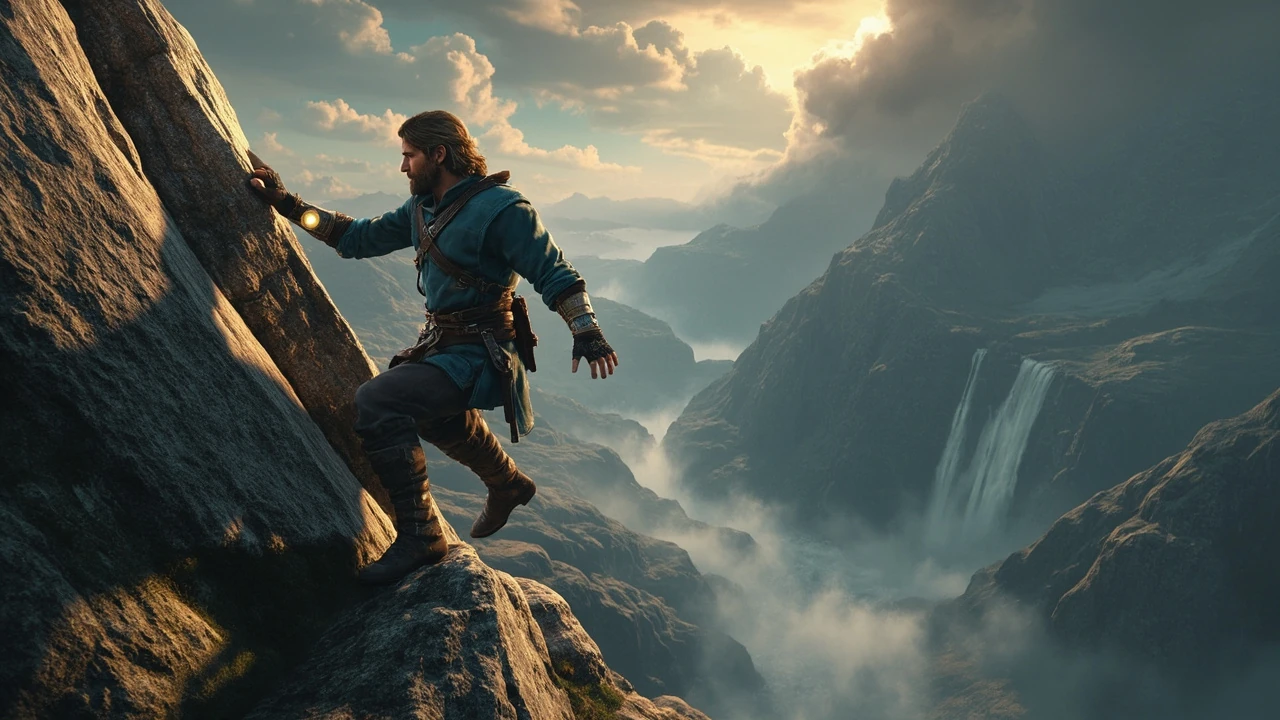
Climbing gear BOTW: how Breath of the Wild’s stamina system actually works
Climbing is the first traversal challenge every player meets in Breath of the Wild, and the climbing gear BOTW set is what turns a wall into a route. A new shrine or tower can sit behind a 200-metre cliff face, a rainstorm can drop Link off a rock in two seconds, and the stamina wheel keeps draining while you plan the next grip. Understanding how the climbing set, the stamina gauge, weather, and surface geometry interact is the difference between reaching that Sheikah tower in five minutes and burning through three meals at its base.
This article focuses on the mechanics that govern climbing rather than lore. It walks through how stamina is calculated, how each piece of climbing gear changes the math, what rain actually does to your grip, and how the engine treats different surface types. The goal is a mental model that holds up in any region of the map, not just the Great Plateau.
Why climbing is a core traversal system, not a side mechanic
Breath of the Wild is a 3D open-world action-adventure game built around free vertical movement. Climbing is one of three pillar traversal systems alongside gliding and swimming, and the team at Nintendo EPD designed the world so that almost every interesting location has at least one route that requires vertical scaling. Towers, shrines, labyrinths, korok puzzles, and stable roofs are all positioned with climbing in mind.
That design choice has three practical consequences for players:
- You can attempt almost any cliff, and the game responds with a believable physical simulation rather than a hard “you cannot go here” barrier.
- Failure is recoverable. If you run out of stamina mid-climb, Link drops, takes fall damage, and can try again. Death by climbing is usually self-inflicted, not forced by the system.
- Every climbing action consumes the same shared resource: the circular stamina wheel. Stamina used to climb is stamina you will not have to swim, sprint, or charge a bow with.
Because the resource is shared, every climbing decision is also a stamina-budget decision. A route that uses the climbing set and avoids rain is mechanically cheaper than the same route attempted in a storm without the set, even though the visible distance is identical.
The stamina wheel and how it drains while climbing
Stamina is represented as a green ring around the heart gauge in the HUD. Each full ring of stamina equals one quarter-wheel, and Link’s base stamina is one full wheel at the start of the game. Every shrine you complete and every shrine orb you exchange at a goddess statue can add a quarter wheel, up to a soft cap that gives Link enough stamina for most climbing challenges without consumables.
When you hold the climb button on a wall, three things happen simultaneously:
- The stamina ring begins to drain at a constant rate tied to the climbing animation, not to the surface angle.
- Link’s climbing speed is set by the stick input and a separate animation state. Pushing the stick hard does not increase stamina cost per second, but it does change the look of the climb.
- A small input buffer absorbs the moment you release the button, so you can let go a hair before the ring empties without falling.
The drain rate is the constant the rest of the system hangs on. The game uses an internal stamina cost per second while climbing, and a separate cost for jumping between walls. That second value is the reason diagonal jumps between two parallel walls feel expensive, while straight-up climbs of the same vertical distance feel manageable.
On ledges and stable ground the wheel does not drain. The instant Link enters a stand state the engine pauses the timer, which is what makes a planned pause on a ledge so valuable on long routes. The wheel also recovers slowly while Link is standing still, but the recovery animation has a small delay, so the practical rule is to stop climbing well before the ring empties rather than try to recover in place.
What the climbing gear BOTW set actually changes
The climbing set has three pieces: the climbing bandanna, the climbing gear, and the climbing boots. Each piece adds a flat stamina reduction while climbing, and the bonus stacks across the set. With all three equipped and upgraded at Great Fairy fountains, the total reduction reaches a point where the effective stamina cost per second on a flat wall is roughly one third of the unarmored value.
The set bonus is split in a specific way that matters for route planning:
| Piece | Base effect | Upgraded effect | Armor slot |
|---|---|---|---|
| Climbing bandanna | Reduces stamina consumed while climbing | Larger stamina reduction | Head |
| Climbing gear | Reduces stamina consumed while climbing | Larger stamina reduction | Body |
| Climbing boots | Reduces stamina consumed while climbing | Larger stamina reduction | Legs |
Two practical notes follow from this table. First, the set bonus applies only while climbing, not while gliding or swimming, so equipping the climbing set on a long glide is wasted defensive slot space. Second, partial sets are still useful: two pieces give a meaningful reduction for shorter climbs, and a single piece is enough to extend a stamina wheel by a few seconds on a moderate wall.
The set also has a defense value that scales with upgrades, but the defense is low compared to combat sets. Treat the climbing gear as a traversal tool first and a body piece second, and reserve the body slot for higher-defense armor when you expect heavy combat after a long climb.
How surfaces change the stamina math
Not every wall costs the same stamina. The climbing system is tied to a per-surface value that the engine reads from the material attached to the geometry. Rough stone is the cheapest, polished metal or glass is expensive, and wet surfaces are treated as a separate state that the weather system writes onto the material at runtime.
| Surface | Stamina cost relative to rough stone | Common locations | Best response |
|---|---|---|---|
| Rough stone | Baseline (1x) | Most cliffs, ruins, towers | Standard climb |
| Smooth stone | Higher per second | Sheikah shrine exteriors, walls near waterfalls | Jump-climb rhythm |
| Wood | Lower per second than stone | Stables, huts, bridges | Fast climb |
| Metal or polished surfaces | Significantly higher per second | Sheikah tech, shrine interiors | Climb short sections only |
| Wet surface (any material) | Sharp spike in cost and slip chance | Any wall in rain | Wait out the storm or detour |
The takeaway is that the climbing gear bonus is applied on top of the surface cost, not as a replacement for it. A wet metal wall with the full climbing set is still more expensive than a dry rough stone wall with no set, so the order of operations when planning a route is surface first, weather second, gear third.
This is also why some shrine exteriors feel like they drain the wheel twice as fast. The walls are smooth, the geometry forces diagonal movement, and the camera keeps the skybox hidden so the rain is invisible until you hear the audio cue. Once you know that, you plan the shrine entry from the back or from above using the surrounding terrain.
What rain does to climbing
Rain is the only weather effect that fundamentally changes the climbing rules. When the weather state is set to rain, two things happen on any climbable surface:
- Stamina drain increases sharply, so the same wall eats the wheel in a fraction of the normal time.
- Link’s grip chance drops. At higher rain intensity, the game can trigger a slip event that pushes Link off the wall regardless of remaining stamina, often near the end of a long climb.
Because the slip event is gated by weather state rather than by stamina, eating a stamina-recovery meal will not save you once the rain has started. The reliable responses are to wait, to find an overhang, or to use a campfire and skip the in-game time forward. The campfire trick works because the weather system samples the current region and rolls a new forecast when time advances, and the chance of clearing rain in a few hours is high enough to make skipping a common strategy near tall towers.
The rain penalty also applies inside shrines that have open-air segments, and it triggers in any region including Gerudo Desert and Hebra. The desert in particular is a place where the climbing set is often equipped for cold or heat resistance, so the rain penalty is a reminder that weather always trumps gear selection in this game.
How to plan a climb before you start
A useful pre-climb checklist looks less like a button combo and more like a route survey. Walk a short loop around the base of the wall and look for:
- Material changes. If the wall is two-thirds rough stone and one-third smooth shrine stone, plan to mount the rough section.
- Overhangs and ledges. Each ledge is a free stamina pause because the engine stops the drain when Link is in a stable stand state.
- Rain. Check the skybox and listen for the weather audio cue. If a cloud is sitting on the wall, the climb is not safe.
- Wind. High wind changes the jump arc between walls and can throw off mid-air stamina budgeting on long jumps.
- Enemy placement. A bokoblin camp at the base of a tower will pull Link off the wall the first time an arrow lands.
Once the survey is done, equip the climbing set, eat a stamina-recovery meal if you have one, and start the climb with a clear plan for where you will pause. Skipping the survey step is the most common cause of mid-climb deaths, because players tend to start the climb from the wrong side of the wall and only realise it when the surface type changes mid-route.
Stamina recovery meals and how they actually work
Stamina recovery meals do two separate things depending on how they are cooked. A meal with multiple stamina-enhancing ingredients can either refill the green wheel to full or add temporary bonus wheels that disappear when Link takes damage or rests. The system uses an internal per-ingredient stamina value and a simple combination rule:
| Cooked meal type | Effect | Common ingredients | Best use |
|---|---|---|---|
| Single stamina ingredient | Restores a portion of the green wheel | Stamella shrimp, stamion shrooms, courser bee honey | Quick mid-route refill |
| Multiple stamina ingredients | Adds yellow temporary wheels | Endura carrots, endura shrooms | Long climb or boss fight stamina buffer |
| Mixed hearts and stamina | Restores hearts and a small stamina portion | Stamina ingredient plus a heart radish or apple | Pre-boss prep |
| Elixir with stamina | Restores a portion of the green wheel plus a buff | Stamella shrimp plus a monster part | When cooking is unavailable |
Yellow temporary wheels are the most efficient climbing resource because they do not waste a recovery meal’s healing effect. Three endura carrots cooked together give Link roughly two and a half extra wheels for several minutes, which is enough to climb most towers in one go with the full set equipped.
One common mistake is cooking stamella shrimp with heart ingredients and expecting the yellow wheels. The system only grants yellow wheels when two or more stamina-granting ingredients are combined. A single stamina ingredient plus a heart ingredient produces a mixed recovery meal that heals hearts and restores a portion of the green wheel, but does not add temporary wheels.
Upgrading the climbing set at Great Fairy fountains
The climbing set starts at a base defense and base stamina bonus. To increase either, you need to bring specific materials to a Great Fairy fountain. Each upgrade tier asks for a particular bundle of bugs, lizards, or monster parts depending on the tier, and the same materials are not always available near the set’s spawn location.
For most players, the practical priority is to upgrade the climbing boots first, then the climbing gear, then the bandanna. The boots give a meaningful jump in stamina reduction per tier, and they pair well with cold-resistance or heat-resistance headgear, which lets you keep a defensive piece in the body slot for hybrid environments like Hebra or Gerudo.
Each tier also raises the set’s defense, which matters more than players expect. A naked climb in the rain can knock Link off a wall because the slip event triggers even with full stamina. Extra defense does not prevent the slip, but it can keep a single arrow from ending a long climb, which is often the practical difference between reaching a tower and respawning at the last shrine.
Climbing gear vs. other traversal armors
Breath of the Wild has multiple traversal-oriented armor sets, and the climbing set is the most general purpose. The other sets solve specific problems:
- The Zora set lets you swim up waterfalls, which is a completely different stamina interaction because the game replaces climbing with a charged swim.
- The Rito set gives an updraft on mid-air jumps, which removes the need to climb certain towers entirely.
- The Sheikah set grants a night-speed bonus, which does not affect climbing at all but is useful for shrine hunts.
- The snowquill set grants cold resistance, which is sometimes more important than a smaller stamina bonus in Hebra.
The climbing gear BOTW set is the only set that reduces the cost of every climb on every surface. If you are deciding which traversal set to commit upgrade resources to first, the climbing set is the answer unless your immediate goal is a specific shrine or quest that requires the other set’s specialty.
There is no penalty for swapping sets mid-route, and the game does not trigger any animation when you open the inventory on a ledge. A common late-game pattern is to keep the climbing set in the inventory and switch into it only when a climb is required, which preserves the body slot for combat armor during exploration.
How updrafts and fire interact with climbing
Fire and updrafts are the two environmental tools that let you bypass a wall instead of climbing it. A grass-fire updraft, lit with a fire arrow or a flint, lifts Link into the air on a thermal column. Paragliding from the top of the updraft often reaches the same place as a long climb, in less time and with zero stamina cost.
The interaction is not free, though. The updraft itself costs nothing, but the paraglider consumes a small amount of stamina only on launch, and the flight path is gated by the same wind system that affects jumps. In open areas, the updraft is usually faster. In tight canyons, the climbing set still wins because the paraglider can only sail over obstacles that have clear airspace above them.
Fire arrows are not required for an updraft. Any flame source, including a wooden weapon lit by a campfire, will ignite dry grass. This is useful in regions where arrows are scarce, and it also works on snow with a longer fuse, though the updraft is weaker because wet snow burns slowly. The reliable test is to throw a fire weapon at the grass and watch the visual cue; if the column rises, the glide path is open.
Common climbing failures and how to read them
Most climbing deaths fall into a small number of repeatable failure modes. Reading the failure mode early is faster than retrying the climb.
| Symptom | Likely cause | Diagnostic step | Fix |
|---|---|---|---|
| Wheel drains twice as fast as expected | Wet surface from rain | Look up, check skybox | Wait for weather change or use a campfire |
| Slip near the top after a long climb | Slip event triggered by weather | Listen for weather audio cue | Restart the climb after time skip |
| Wheel drains normally but Link falls early | Stamina misread on HUD | Count rings, not pixels | Use a meal with extra yellow wheels |
| Climb stops near the top of a tower | Soft cap on stamina regen during climb | Watch the wheel recovery animation | Drop, rest on a ledge, then resume |
| Mid-air jump costs more than expected | Stamina cost on wall-jump is separate from climb | Reduce the number of mid-air jumps | Pick a route with fewer wall-jumps |
| Link gets knocked off mid-climb | Enemy arrow or shock from lightning | Check for enemies and metal gear | Clear the camp or unequip metal |
The pattern across these failures is that the game does not warn you about a hidden state. The wall does not glow, the rain does not flash, the stamina cost does not display a multiplier. The signal is always the same: the wheel drains faster than the climb should justify, and the response is to look at the environment rather than the HUD.
Climbing combat: what happens when enemies attack mid-climb
Combat while climbing is one of the least forgiving interactions in the game. The bow can be drawn, but the camera locks into a narrow vertical arc, and the climb animation pauses. Most projectiles will knock Link off the wall if they connect, which can convert a successful climb into a fall-damage death in a single hit.
The common responses are situational:
- Bokoblins and Lizalfos at the base of a tower can be cleared with a bomb before you start the climb.
- Wizzrobes and ranged enemies on ledges above are best dealt with after the climb, by paragliding onto their ledge from a higher point.
- Lynels near a climb route are usually a signal to take a different route entirely. The cost of fighting a Lynel on a wall is rarely worth the prize.
- Keese swarms around a tower can be dodged by waiting until they disperse, which usually happens within a minute as the game cycles their spawn.
A useful pattern for tower climbs in enemy territory is to scale a nearby hill first, glide onto a roof or a high ledge with a clear view of the wall, and then drop onto the climb start with a bomb ready. The approach uses a small amount of stamina for the glide but avoids the worst case of being knocked off the wall in the middle of a long route.
How the climbing system compares to other open-world traversal systems
Compared to other open-world action games, Breath of the Wild‘s climbing is unusual because the cost is shown directly on the HUD rather than hidden behind a stamina bar or a fatigue system. For additional context on how the franchise iterated toward that design, the long-running Legend of Zelda series had already experimented with stamina and climbing hooks in earlier entries, but the integration with weather, surface type, and a dedicated armor set is the modern shape of the system.
Most open-world games since 2017 have either copied the stamina-wheel approach or added their own explicit traversal meters. Elden Ring‘s Torrent, Spider-Man‘s web meters, and Genshin Impact‘s character-specific stamina all solve the same problem in different ways. The climbing gear BOTW set is interesting from a design point of view because it gives the player a tangible reward for seeking out side content such as chests, shrines, and Great Fairy fountains, and it turns traversal efficiency into a long-term progression system rather than a starting tool.
One limitation of the BOTW approach is that the stamina wheel is a single shared meter, which forces the player to make trade-offs that other games avoid. In a game with separate meters for climbing, swimming, and gliding, the player can ignore some meters and focus on the one that matters. In BOTW, ignoring the climbing meter means ignoring the climbing set, which is the very tool that makes long climbs possible. That coupling is the design choice that the climbing set exists to soften, and it is the reason the set is one of the most-used armor pieces in a typical playthrough.
Reading the map before a long climb
The map in Breath of the Wild shows elevation through contour lines, and learning to read those lines is a quiet skill that pays off on every climb. A tower that looks impossibly high on the ground is often shorter on the map once you subtract the plateau it stands on. The Sheikah slate also has a sensor that can highlight shrine locations, and shrine routes tend to follow climbable contours rather than dead-end cliffs.
For long routes, mark the climbable sections on the map before you start. The mark does not need to be precise; a simple icon on the base of the wall and another at the top is enough to remind you that the climb is two sections of stamina rather than one.
Shrine icons also have a small elevation tint that hints at the climb height. A blue icon usually means a short climb from a nearby plateau, while a red icon usually means a long climb from a low base. This is not a rule, but it is a useful first pass when you are planning a route across a region you have not yet explored.
Advanced techniques: jump climbs and stamina management
Two techniques separate casual climbers from efficient ones. The first is the jump climb, where you let go of the wall, hold the stick to gain a small lateral hop, and reattach on the same wall. The game does not refill any stamina during the jump, so each jump is a fixed cost on top of the climb cost. The trick is to use jump climbs only when the route demands a ledge that cannot be reached directly.
The second is mid-air stamina budgeting. When you know a climb will end with a paraglider launch, you can spend the last quarter of the wheel on a final push, drop, and immediately open the glider. The paraglider does not cost stamina to hold open after the launch, so the only budgeted cost is the launch itself.
A third technique worth knowing is the diagonal jump between two parallel walls. The stamina cost is high per jump, but the visual distance covered is also high, which makes the technique useful for short chimney climbs where the wall geometry funnels Link into a tight vertical slot. The cost is paid back in saved climb time, and the climbing set reduces the jump cost the same way it reduces the climb cost.
When to skip the climb entirely
Sometimes the right answer is to never touch the wall. A few common situations where skipping the climb is faster than doing it:
- The target is a shrine on a plateau with a known road or path that circles up the back side. The road usually takes longer on the map but less stamina in practice.
- The target is a tower in active rain. Time-skipping through the storm and then climbing saves more resources than climbing in the rain.
- The target is a korok puzzle that can be reached by paragliding from a higher nearby peak. The peak climb costs stamina, but the glide is free.
- The target is a chest on a roof that can be reached by a well-placed cryonis block or a magnesis lift.
Stamina is a budget that does not regenerate meaningfully during a climb, so the question is not “can I climb this” but “is this the cheapest way to reach the top.”
Putting it together: a sample end-to-end route
Suppose the goal is a Sheikah tower on a 180-metre cliff in a rainy region. A complete route would look like this:
- Survey the wall from the base. Note the rough stone section on the right and the smooth shrine stone on the left.
- Check the skybox. Rain is visible, so set a campfire under an overhang and skip two hours of in-game time.
- After the rain clears, cook three endura carrots into a temporary-stamina meal and equip the full climbing set upgraded to the second tier.
- Start the climb on the rough stone side, using the ledges as natural pause points.
- Near the top, switch to a smooth section only if the geometry forces it, and budget the final wheel for the paraglider launch onto the tower platform.
- After the tower unlocks, glide directly to the nearest shrine to spend the remaining yellow wheels before they expire.
That sequence will use roughly one and a half base wheels with the upgraded set and the temporary meal, leaving enough stamina to glide to a shrine and clear it without further cooking. The same route attempted in the rain with the base climbing set would burn two and a half wheels, fail at least once, and require a recovery meal before the shrine.
Frequently asked questions
Does the climbing gear BOTW set affect swimming or gliding?
No. The climbing set only reduces the stamina cost while you are on a climbable surface. Gliding, swimming, sprinting, and bow charging all use the same shared stamina wheel but are not affected by the climbing set bonus. For water-heavy routes, the Zora set is the equivalent traversal tool.
How many pieces of climbing gear do I need for a real difference?
Two pieces give a noticeable reduction that is enough to extend a base wheel on a moderate wall by a few seconds. The full three-piece set is what turns long climbs from a stamina gamble into a routine, and the upgraded set is what lets you climb most towers without a recovery meal.
What is the fastest way to get the climbing bandanna?
The bandanna is in a chest inside a shrine in the Dueling Peaks region, and the path to that shrine does not require the climbing set. The chest is the prize, and the shrine itself is the puzzle. If you are still in the early game, the bandanna is one of the first meaningful traversal upgrades you can pick up.
Can I climb in lightning storms?
Lightning is dangerous because metal equipment draws strikes. Climbing does not change the strike chance, but equipping metal armor on a high ridge during a thunderstorm is one of the most reliable ways to die in the game. The climbing set is cloth and leather, so it does not attract lightning on its own, but be cautious of any metal gear on the body or head.
Why does Link sometimes slip on a dry wall?
Slips on dry walls are rare and usually tied to a hidden weather transition. The game samples the weather state every few seconds, and a sudden shift to rain will trigger the slip event even if the rain is not yet visible. The fix is to drop, wait for the weather to settle, and restart the climb.
Do the yellow temporary wheels from endura meals work on every climb?
Yes. The yellow wheels behave like extra stamina for every system that consumes the wheel, including climbing, swimming, gliding launches, and bow charging. They drain from the top down, so the green wheel is your last-resort stamina, which is the safer order to budget in.
Is the climbing set worth upgrading over the barbarian or ancient sets?
It depends on your current goal. The barbarian and ancient sets are combat sets, and they do not change traversal. If you spend most of your time in the open world rather than in combat, the climbing set pays for itself in saved meals. If you are in the late game and mostly fighting bosses, the combat sets will give a higher immediate return.
Can I use the climbing set together with the snowquill set?
Yes, but only across two armor slots. A common hybrid is the snowquill headpiece for cold resistance and the climbing boots for stamina reduction, with the body slot kept free for a defense piece. This is one of the most common loadouts for the Hebra region, where the climb cost and the cold damage both matter.
What happens if I run out of stamina in the middle of a jump between walls?
The game will try to auto-attach to the nearest climbable surface during the jump. If no surface is within reach, Link falls. The auto-attach only triggers on wall-jumps and not on free-fall, so the safe play is to time the jump so that you have at least a quarter wheel left when you reach the next wall.
Is there a way to climb faster without the set?
No. The animation speed of the climb is fixed, and the only variable is the stamina cost per second, which the set reduces. Faster climbing is therefore a stamina-budget problem rather than an animation problem, and the set is the only direct solution. Indirect options include choosing shorter routes, using updrafts, and skipping climbs with the paraglider.
Leave a Reply