
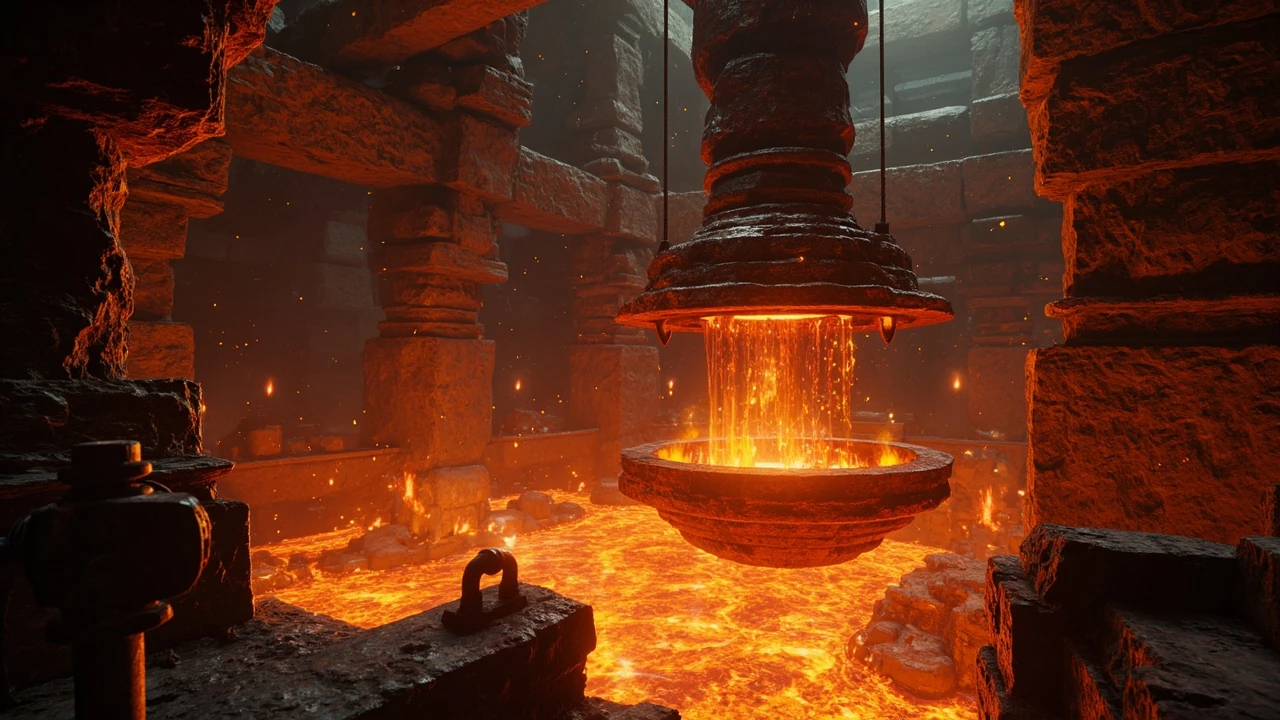
Adamantine forge BG3: what it is and why players chase it
For most players the appeal is not the raw stat numbers. Two of the forge pieces are tied up in companion approval, and the act of crafting requires you to manage lava flows and a timed boss pattern that few other encounters in the game use. The adamantine forge BG3 location also functions as a stable transition point between the surface, the Underdark, and the Mountain Pass routes, so understanding it is useful even for players who do not care about the gear. This article is a practical walkthrough of the location, the quest steps, the encounter itself, the crafting options, and the common pitfalls that catch first-time players.
Where the adamantine forge is located in BG3
The adamantine forge is reached through the Grymforge, a sub-region of Act 1 that is most often entered from the Rosymorn Monastery side of the Mountain Pass. The monastery is the visible landmark on the world map; the route down is less obvious and requires either a jump down a chasm, a careful descent through a rubble-filled passage, or a teleport interaction with a rune that several players miss. Once inside the Grymforge, the area unfolds as a long dwarven complex with living quarters, a ritual site, a corrupted sharran enclave, and finally the forge chamber at the deepest level.
The Grymforge can also be accessed from below. The Underdark contains a connecting tunnel that surfaces near the forge’s antechamber, which means players who already explored the Myconid Colony and the Sussur Tree can approach the forge without ever climbing the Mountain Pass. Both routes converge on the same end-of-complex event with Nere and the duergar, after which the forge chamber opens.
Two viable paths into the forge
- Mountain Pass route: Enter the Rosymorn Monastery, deal with the githyanki patrol, then descend into the monastery crypts. The crypts contain a sealed door that opens the way to the Grymforge. This is the most common path for players who followed the Mountain Pass trail after the goblin camp.
- Underdark route: From the Myconid Colony or the Sussur Tree area, find the southern tunnel network that leads into the forge antechamber. This route is more obscure and is easy to miss because the map does not label the entry clearly.
Whichever path you take, the forge itself is at the end of a long, lava-lit corridor. The platform is visible from the moment you enter the final chamber, with the crucible suspended above the lava and a large control lever on the right-hand side of the arena.
How to start the adamantine forge quest
The quest, simply called “The Adamantine Forge” in the journal, does not appear until you reach the Grymforge proper. The chain that triggers it begins when you encounter the duergar patrol and the dwarf slave Brithvar near the entrance. Brithvar is the most reliable quest giver for the forge: he asks you to help him free the deep gnomes and end the duergar’s pact with the Absolute, which leads you deeper into the complex.
The actual trigger for the forge subquest is the scene with Elder Brithvar, the tiefling Nere, and the Absolute’s intellect devourer parasite. Once that scene resolves and the area is clear, the journal updates with the explicit instruction to find the forge and use it. From that point the quest becomes self-contained: find the forge, defeat the guardian, choose what to put into the crucible, and pick up the resulting weapon or armour.
Quest flow at a glance
- Reach the Grymforge and meet Brithvar’s group near the entrance.
- Find the enslaved deep gnomes and decide how to handle their captivity.
- Confront or side with the duergar at the ritual site where Nere is being held.
- Resolve the Absolute parasite that infects the tiefling leader.
- Descend to the forge chamber and complete the “Forge a weapon” objective.
Steps 2 to 4 have meaningful consequences. The duergar patrol can be fought, bribed, or stealthed around, and your choice affects how many deep gnomes survive. None of that is strictly required to use the forge, but it does shape the surrounding story, and several players complete the forge only to realise they skipped content that would have made the encounter easier.
Reaching the forge chamber step by step
Once the ritual site is resolved, the path to the forge is a short descent through a corridor of ruined dwarven architecture. The chamber is large and visually distinct: a raised platform of adamantine-veined stone, a central crucible hanging over a lava river, a sunken floor that the platform can pass over, and the control lever on the south wall. The lighting is dominated by the orange glow of the lava, with patches of cold blue from the dormant adamantine veins in the rock.
Two key items sit in plain sight on the platform:
- The Crucible: the suspended metal container into which you place one of the forge moulds and a chunk of raw material.
- The Moulds: a small set of weapon and armour moulds found on a stone table near the platform’s edge. These define what the forge can produce in a single run.
The lever on the wall controls the platform. Pulling it moves the platform across the lava, and the design of the encounter assumes that the player uses the platform to position the crucible, dump the molten metal, and kite the boss away from the lava flow.
The Grym encounter and the lava mechanic
The forge guardian is a large construct called Grym. It is not a standard combat: Grym is invulnerable to physical damage unless the player hits its exposed adamantine tendons, and the tendons only become vulnerable when the construct is standing in lava. The forge’s lever controls a lava valve that floods the arena, which is the only practical way to damage Grym in most fights.
The basic loop is:
- Pull the lever to flood the arena with lava.
- Pull Grym into the lava, ideally with a thrown potion, a control spell, or a battlemaster manoeuvre that forces movement.
- Hit the exposed tendons while Grym is standing in the lava. Most physical and many magical attacks will work, but the lava is the only thing that turns the fight from a stalemate into a real encounter.
- Use the platform to retreat when lava level rises too high, or when you need to reset your positioning.
Grym is highly resistant to many conditions and resistant to most spell damage that does not target the tendons. Crowd control spells such as Ice Knife, Ray of Frost, and Sleet Storm can move or slow Grym, but the encounter is deliberately built around the lava mechanism, so most parties end the fight by repeatedly kiting the construct into the lava and hitting the tendons during the brief window when they are exposed.
What to bring into the fight
- A ranged or throwing character to bait Grym into the lava and hit the tendons from a distance.
- At least one spellcaster with a control spell that can move Grym, even if the spell does little damage. Forced movement is the most reliable way to land the boss in lava.
- A healer with ranged options, because standing next to the platform in melee is risky once lava levels rise.
- At least one character that can pull the lever while the rest of the party is spread around the arena. Pulling the lever is a free action but requires the character to be near the wall mechanism, not on the platform.
Choosing a mould and a material
The forge produces a single item per run, and the combination of mould and raw material determines what you walk out with. The moulds are a small set of fixed items: a longsword, a greatsword, a scimitar, a dagger, a mace, a war pick, a halberd, a spear, a medium armour piece, and a heavy armour piece. The raw materials are scattered around the forge chamber, the surrounding Grymforge levels, and a few of the earlier Act 1 zones.
The standard pattern for most players is to choose one of the two signature pieces of equipment and use a high-quality ore found earlier in the game. The two most commonly cited items are the adamantine longsword “Nyrulna” and the adamantine medium armour “Yvonnel’s Embrace”. Nyrulna is a thrown returning weapon with a lightning rider, and Yvonnel’s Embrace is medium armour that prevents critical hits against the wearer and grants a stacking damage bonus against frightened targets. Both are popular because they are tied to companion interactions as well as raw performance.
Where the raw materials are found
| Material | Where to find it | Best used for |
|---|---|---|
| Adamantine ore | Underdark, Grymforge, Rosymorn Monastery caves | Default choice for almost every mould |
| Mithral ore | Underdark and the Sussur Tree area | Heavy armour moulds, for builds that want medium-armour class from a heavy piece |
| Sussurite bark | Sussur Tree, southern Underdark | Weapons with the Sussur line, which silences targets on hit |
| Legendary ore fragments | Hidden caches in the Mountain Pass and the Underdark | High-tier adamantine weapons, used to add bonuses on top of base adamantine |
The table above is a general guide, not a strict rule. Some players deliberately choose a different combination for roleplay or thematic reasons, and the forge accepts any of the four materials paired with any mould. The combination simply defines the resulting item’s flavour text, weight, and damage type.
The signature adamantine forge rewards
Two rewards are tied closely to the adamantine forge BG3 quest and to companion story beats, which is why they are the ones most players aim for. Both are listed in the journal when the forge is first activated, which is a useful sanity check that the quest has registered correctly.
Nyrulna, the legendary thrown longsword
Nyrulna is a returning longsword that deals additional lightning damage and produces a chain-lightning rider on hit. Its signature feature is that it returns to the wielder after each throw, which makes it one of the strongest ranged options in Act 1 and a useful pickup for melee builds that need a reliable thrown attack. Nyrulna is also tied to the tiefling companion Wyll’s personal quest, which means the item has a fixed presence in the narrative even for players who would never pick it for stats alone.
Yvonnel’s Embrace, the signature medium armour
Yvonnel’s Embrace is medium armour that prevents critical hits against the wearer and grants a stacking damage bonus against frightened targets. It is tied to the tiefling companion Karlach’s personal quest. Mechanically it is excellent on tanks and on melee builds that want to push their damage against controlled targets without sacrificing armour class.
Other useful forge items and where they fit
While Nyrulna and Yvonnel’s Embrace are the most discussed, the forge’s other moulds produce items that are competitive with the best Act 1 and Act 2 drops. They are worth knowing about because the specific item you craft is decided when you drop the material into the crucible, not when you first interact with the forge.
- Adamantine greatswords and war picks are strong two-handed options for strength builds that want a single high-damage weapon instead of a thrown sword.
- The scimitar and dagger moulds are useful for rogues and for characters that rely on sneak attack, particularly when paired with materials that grant elemental riders.
- The medium and heavy armour moulds give the highest base armour class in the game up to that point and pair well with the mithral ore for medium-armour-class heavy armour.
- The halberd, spear, and mace moulds round out the set for reach, control, and radiant damage builds.
The adamantine forge in Baldur’s Gate 3 is one of the most memorable set-piece encounters in the early-to-mid game, because it combines exploration, a small puzzle, and a boss fight into a single arena. The forge sits deep inside the Grymforge, a ruined dwarven stronghold that players reach while pursuing the game’s main story through Act 1. It rewards players with a unique crafting mechanic: a small set of armours and weapons whose visual design, lore, and defensive bonuses are tied directly to the location, which is why it is often mentioned alongside other standout Act 1 milestones such as the goblin camp and the Underdark routes.
The forge is a single-shot crafting station, so the choice is permanent. The game does not reset the crucible, which means you cannot go back later and craft the second item you skipped. This is the main reason the adamantine forge BG3 location is treated as a significant decision rather than a simple loot stop.
Common pitfalls when running the adamantine forge
The encounter punishes players who treat it like a standard boss fight, and several failure modes appear repeatedly in player reports.
Ignoring the lava mechanism
The most common mistake is to try to damage Grym directly without using the lava. Most builds cannot output enough damage through the construct’s resistances in the time the arena stays clear, and the encounter is balanced around the lever mechanic. If a party ignores the lever and tries to brute force the fight, the run will usually end in a total party kill once lava levels rise.
Failing to split the party
The lever has to be pulled during the fight, and pulling it requires a character near the wall. The simplest pattern is to have one character near the lever at all times, two characters on the platform to fight, and one ranged character on the lava-free ledge. Running everyone onto the platform makes it impossible to control the lava and gives Grym a small area in which to cluster the party.
Forgetting that the encounter ends when Grym is defeated
Once Grym is dead, the lava continues to flow if the lever is left in the flooded position. Players who win the fight by a hair and then walk straight into the lava can still die, so the lever should be returned to its original state as soon as the construct falls. The same applies to Grym’s falling body: it can briefly cover a tile of lava and create a safe path that disappears as the body dissolves.
Misreading the mould menu
The forge interface shows the moulds in your inventory along with a brief description, but it does not show the resulting item’s full stat block before the material is dropped. Players who pick a mould without reading the journal entry often realise after the fact that they have produced an item their build cannot use. Reading the journal description for each mould before committing is the simplest way to avoid that.
How the forge ties into companion quests
The adamantine forge is the mechanical core of two companion arcs, which is why it appears earlier in many players’ playthroughs than raw optimisation would suggest.
- Wyll: the quest to forge Nyrulna is the resolution point for Wyll’s personal storyline. Players who have Wyll in the party will see the journal flag for the longsword specifically, and the resulting weapon becomes Wyll’s signature item.
- Karlach: the quest to forge Yvonnel’s Embrace is the resolution point for Karlach’s personal storyline. The armour is meant for Karlach, although other characters can equip it after the quest resolves.
For players who want both items in a single playthrough, the game does not provide a second forge run. The pragmatic approach is to choose based on which companion is more central to the player’s plan, since both items remain useful even on a build that does not match the intended user.
Decisions around the forge that affect later acts
The choices you make around the forge affect more than just the gear. The duergar and deep gnome resolution influences which NPCs are available in Act 2, and the fight with Grym has minor consequences for the Mountain Pass storyline, because some NPCs comment on whether the forge was used at all.
One often-overlooked consequence is that the adamantine forge is the source of the only reliable “silence on hit” weapons in the early game if you choose the Sussurite material. Those weapons are extremely strong against enemy spellcasters in Act 2, because several boss fights in that act depend on enemy concentration checks and verbal spells. Players who know that the Underdark contains a Sussur Tree can plan a Sussurite weapon as a deliberate Act 2 counter, rather than treating the forge as a pure Adamantine loot stop.
Comparison with other crafting stations in Act 1 and Act 2
The forge is one of three major crafting points in the early game, and the way it differs from the others is what shapes its design. The table below compares the forge to the other two stations, which is useful when planning a build that needs to know where to commit resources.
| Station | Location | Output | Best for |
|---|---|---|---|
| Adamantine forge | Grymforge | One weapon or armour piece from a small set | Signature Act 1 items and companion storylines |
| Sussur Tree kiln | Southern Underdark | Sussurite weapons that silence on hit | Countering spellcasters in Act 2 |
| Camp alchemy bench | Player camp | Consumables, arrows, alchemical ammunition | Restocking between fights and supporting builds that need specific buffs |
The forge is the only one of the three that produces permanent gear from a fixed set of moulds, which is why it is the most consequential crafting decision in the early game. The alchemy bench and the Sussur Tree are repeatable, but their outputs are either consumable or already on a known upgrade path.
Build-specific recommendations for the forge
The “best” item from the forge is build-dependent, and the choice changes the way the rest of the early game feels. The list below is a quick starting point, not a strict tier list, and assumes a standard party of four characters at roughly level 4 to 5, which is when most players reach the forge.
- Strength-based melee characters: the greatsword or war pick with adamantine ore is the most reliable single-target damage option. Nyrulna is a strong alternative for characters that want a thrown weapon without losing melee output.
- Dexterity-based rogues and monks: the scimitar or dagger with adamantine ore keeps sneak attack and unarmed strike damage scaling without sacrificing flavour. The thrown longsword is still a strong option if the build can spare the feat.
- Tanks and front-line characters: Yvonnel’s Embrace is the obvious choice because of its critical-hit protection. Heavy armour with mithral is a good alternative if the build needs to keep a high base armour class.
- Spellcasters and control builds: the Sussurite weapon is usually stronger than any adamantine weapon, because silence on hit is rarer than raw damage at this level. The daggers and scimitars in the mould list are the most useful for caster-adjacent characters.
These recommendations assume that the party has one of each archetype. A more homogenous party should bias towards whichever item has the broadest use across multiple characters, because the forge’s output is fixed.
Step-by-step summary: completing the adamantine forge in one run
- Reach the Mountain Pass and enter the Rosymorn Monastery. Resolve the githyanki patrol and the monastery’s interior.
- Take the crypt stairs down to the Grymforge entrance. Meet Brithvar’s group and accept the quest chain.
- Free or bypass the enslaved deep gnomes. Decide how to handle the duergar at the ritual site.
- Resolve the Nere parasite event. Confirm that the journal updates to “The Adamantine Forge”.
- Descend to the forge chamber. Pick up the moulds near the platform and choose the raw material that fits the build.
- Approach Grym and start the fight. Pull the lever to flood the arena and kite the boss into the lava.
- Hit the exposed adamantine tendons while Grym is standing in the lava. Use the platform to reposition and avoid lava tiles.
- Defeat Grym and return the lever to its starting position. Approach the crucible and drop the chosen mould plus material.
- Collect the resulting weapon or armour and equip it on the appropriate companion.
Each step has flexibility. Players who reach the forge from the Underdark can skip steps 1 and 2, and players who resolve the duergar through stealth can skip the open combat at the ritual site. The encounter itself, however, is structured: the fight with Grym is the fixed point, and the lever plus lava is the only reliable way to make progress.
Troubleshooting: what to check if the fight goes wrong
Even with a strong party, the adamantine forge encounter can stall. The list below covers the most common failure modes and how to recover from them, in the order they tend to appear.
- Grym refuses to step into the lava: switch the strategy from kiting with weapon attacks to a control spell or thrown potion that forces movement. Spells that push or pull the target work even when physical attacks would bounce off.
- Party members keep dying to lava: split the party so that one character stays near the lever at all times, and avoid stacking more than two characters on the same lava tile. The platform is a safe zone and a useful reset point.
- Damage is too slow to kill Grym in time: the tendons only take damage when the construct is in lava, so confirm that the boss is standing in lava before each round of attacks. Spells that bypass physical resistance can also speed up the encounter.
- The lever will not pull: confirm that the character is on the side of the arena where the lever is mounted, and that the platform is not in the way. The lever is on a fixed wall and cannot be reached from the platform itself.
- The forge does not register the material: confirm that the chosen ore is in the active character’s inventory, and that the crucible is empty. Materials placed in the wrong slot will not produce an item.
These checks cover the most common player reports. The forge has a small number of failure modes, but each one has a clear recovery path once the party understands the lava and lever mechanic.
Why the adamantine forge matters in the broader game design
The forge is a useful case study in how character-defining items are introduced in narrative-heavy games. It is placed in a self-contained sub-region, gated by a meaningful story beat, and tied to specific companion arcs. The reward is not numerically dominant compared with the best drops in the rest of Act 1, but the act of earning it is the point. Players who skip the forge miss a piece of worldbuilding as much as they miss a piece of gear.
From a design perspective the forge also teaches a small but reusable lesson: the game is comfortable asking the player to engage with a custom mechanic, and it rewards that engagement with a single, meaningful output. That pattern shows up again in Act 2 and Act 3, and recognising it in the forge makes later set-piece encounters feel less surprising.
Quick reference: adamantine forge BG3 checklist
The list below is a compact reference for players who want a single screen they can open while running the encounter.
- Reach the Grymforge via the Mountain Pass or the Underdark.
- Resolve the duergar and deep gnome story beats.
- Pick up the moulds and confirm the chosen raw material is in the active inventory.
- Pull the lever to flood the arena, then bait Grym into the lava.
- Attack the exposed adamantine tendons while the boss is in lava.
- Return the lever to its starting position and approach the crucible.
- Drop the mould and the material into the crucible to forge the chosen item.
- Equip the resulting weapon or armour on the appropriate companion.
Frequently asked questions
Where exactly is the adamantine forge in BG3?
The adamantine forge is in the Grymforge, which is reached either by descending from the Rosymorn Monastery on the Mountain Pass or by travelling through the southern Underdark. The forge chamber is at the bottom of the Grymforge complex and contains a raised platform over a lava river with a central crucible and a control lever on the wall.
Do I need Wyll or Karlach to use the forge?
No. The forge is fully usable without either companion, and any character can place a mould and a material into the crucible. Wyll and Karlach are tied to two specific items that the forge can produce, but those items are not required to complete the encounter.
Can I craft more than one item from the forge?
No. The forge produces a single item per playthrough, and the choice is made when the mould and material are dropped into the crucible. The encounter cannot be reset, so the item you craft is the only item you will get from the forge in that run.
What is the best item to craft at the adamantine forge?
For most players the best item is either the throwing longsword Nyrulna or the medium armour Yvonnel’s Embrace, because both are tied to companion quests and have strong combat effects. Sussurite weapons are the strongest alternative if the build needs silence on hit, particularly for Act 2 spellcaster fights.
How do I beat Grym at the adamantine forge?
Pull the lever to flood the arena with lava, then kite Grym into the lava. Hit the exposed adamantine tendons while the construct is standing in the lava, because the tendons are the only way to deal meaningful damage. Use the platform to reposition when lava levels rise, and keep one character near the lever to control the lava flow.
Does the forge change if I side with the duergar?
The forge itself works the same way regardless of how the duergar and deep gnome story beats resolve, but the surrounding story does change. Players who side with the duergar see a different set of NPCs at the ritual site, and several journal entries change to reflect that decision. The forge’s output is unaffected.
What level should I be when I reach the forge?
Most players reach the forge at level 4 or 5. The Grym encounter is balanced for that level range, and a typical party of four at level 5 can complete the fight with a reliable lava strategy. Lower-level parties can still clear the encounter, but they will rely more on forced movement and control spells than on raw damage.
Can the forge be used after Act 1?
No. The forge is a fixed point in Act 1, and the encounter becomes inaccessible once the player moves into Act 2. The Grymforge area remains on the map in some save files, but the forge chamber cannot be entered or used after the story moves on.
Does the material I choose matter for the resulting item?
Yes. The material defines the item’s damage type and rider effects. Adamantine is the standard choice for raw damage, mithral is the standard choice for heavy armour that still counts as medium armour, and Sussurite is the standard choice for weapons that silence targets on hit. The choice is permanent once the material is dropped into the crucible.
What happens if I leave the forge without crafting an item?
If you leave the forge chamber after defeating Grym without dropping a mould and a material into the crucible, the forge is treated as completed without an item. The journal updates to reflect the encounter but no item is added to the inventory. Most players who want to avoid that outcome simply craft the item immediately after the fight, before leaving the chamber.
Leave a Reply