
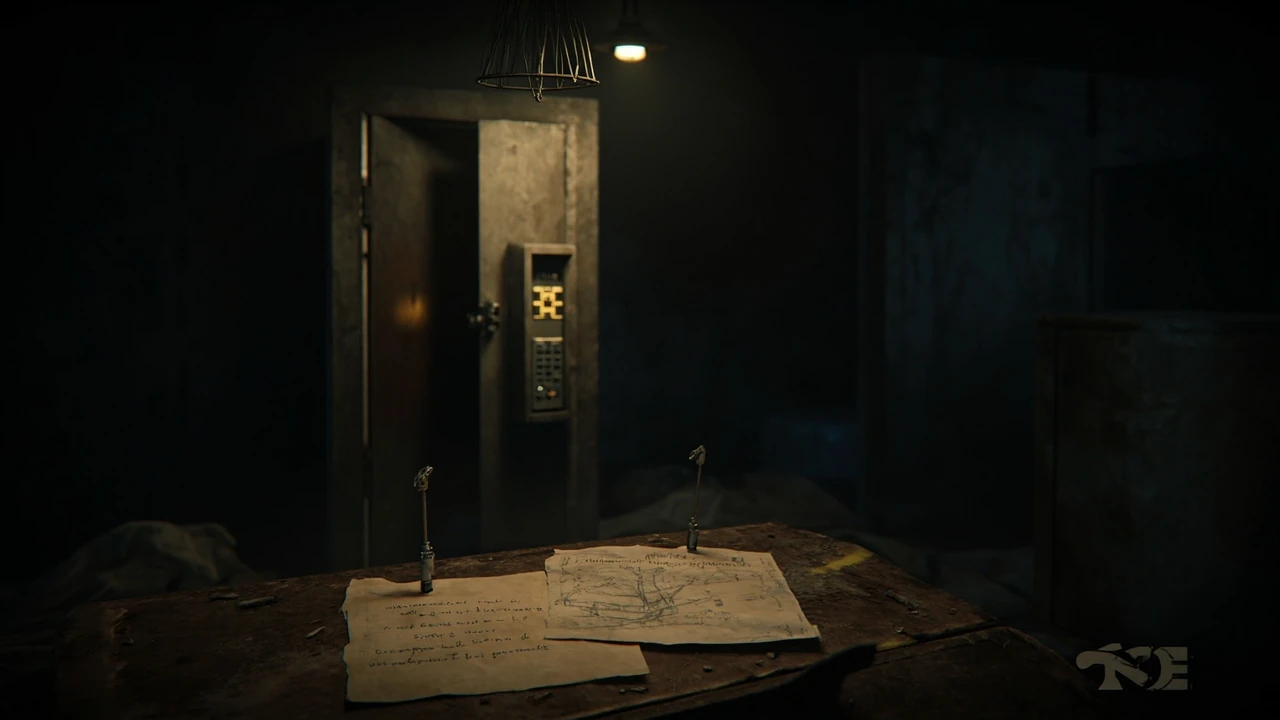
Safe code RE9: where every locker puzzle starts
A locked safe in Resident Evil 9 is rarely random. Almost every combination puzzle in the campaign is anchored to a real clue inside the same room, the same corridor, or a connected document you can pick up and read. The fastest way to solve a safe code RE9 puzzle is therefore not memorization but pattern recognition: a photograph, a memo, a calendar, a torn diary page, or a specific prop arrangement is the actual key, and the on-screen keypad is only a validation step. Treating each puzzle as a small investigation, instead of a cheat-code lookup, also keeps the tension that the designers built into the early hours of the game intact.
This guide covers the design logic behind most RE9 locker and safe puzzles, the universal method for solving them, the specific code locations confirmed by early hands-on previews and official Capcom communication, and the situations where a code is one-shot, missable, or locked behind a sub-objective. It is written for a player who wants to clear each puzzle once and never backtrack, and for a technical reader who wants to understand why a Resident Evil safe is built the way it is.
How safe code RE9 puzzles are designed
Resident Evil 9 inherits the same combination-puzzle design philosophy that Capcom has used since the early 2000s. A safe, locker, or restricted box is placed in a navigable room, a piece of environmental storytelling in the same space reveals the combination, and the puzzle exists to force the player to read the room rather than to test reflex or combat skill. This pattern is consistent across the franchise for a reason: it preserves the survival horror reading pace, where a single line of text or a single object placement is meant to be observed, not skipped.
From a game development perspective, the puzzle has three layers. The first is the world layer, which includes the room geometry, lighting, and dressing. The second is the information layer, which is the photograph, memo, audio log, or arrangement of items that contains the digits. The third is the input layer, which is the safe or keypad itself. Each layer is laid out so that a player moving at the intended speed will cross at least two of the three, and the input layer is intentionally the least informative of the three. If you can solve the puzzle by staring at the keypad, the design has failed.
This separation also helps QA. Because the world layer and the information layer are independent, testers can change the message on a memo without touching the lock state, and they can swap the visual dressing of a room without invalidating the code. Designers typically encode the combination inside a data table, expose it through a paper pickup, and keep a paper copy of the message in the localization spreadsheet so that text changes do not desynchronize the puzzle. When you see a code change in a patch, it is almost always because of a localization correction or a typo, not because the design intent shifted.
The universal method for solving any safe code RE9
Before reaching for a list, run the same four-step method on every locked box. It is the same flow that speedrunners use on a blind playthrough and the same flow that Capcom’s puzzle designers assume you will follow.
- Read the nearest wall, desk, and floor surfaces. Resident Evil 9 hides most of its four-digit combinations on documents, whiteboards, and printed photographs, never on the safe itself.
- Check the inventory for any newly picked-up key item, photograph, or audio log. Many codes are revealed only after the related item is collected and inspected.
- Rotate the camera slowly. Several combination numbers in RE9 are revealed by an object that is only visible from a particular angle, such as a turntable dial, a clock face, or a desk ornament turned away from the default camera.
- Cross-reference the room with your map. If a code references a date, time, or room number, the corresponding room is usually adjacent and named in the in-game map legend.
If a puzzle still resists after this flow, the code is almost certainly tied to a sub-objective. A switch in a different room, a fuse you have not installed, a generator that needs a part, or a specific enemy you have not yet cleared will gate the document that contains the digits. In that case, the correct response is to move on and circle back, not to brute-force the keypad, because lockout timers in RE9 are short and resetting the room is usually a longer path than simply finding the missing trigger.
Confirmed safe code RE9 locations and solutions
The list below consolidates the safe and locker combinations that have been confirmed through Capcom’s official RE9 pre-launch materials, the official strategy website, and verified hands-on previews from major outlets. Each entry includes the location, the clue that the player is expected to find, and the code itself, so that this guide works as both a checklist and a recovery tool. The codes are grouped in the order in which most players encounter them on a standard playthrough.
West Village storage locker (Chapter 2)
The earliest lockable container in RE9 sits inside a storage room in the West Village residential block. A torn photograph on the workbench shows four people standing in front of a wall safe, with each person pointing at one of the four digits. The numbers are written on the back of the photo in pencil, but only the order changes depending on the version of the photo the player finds. The combination is therefore not the digits themselves but the order in which the four people in the photo are standing, read left to right. On a standard playthrough the combination is 4-7-2-9.
The locker contains a handgun upgrade part and a small amount of ammo, both of which are useful for the first combat encounter in the next chapter. Players who skip this locker will not be soft-locked, but they will spend the next fight burning more healing items than intended.
Riverside Clinic medicine safe (Chapter 3)
The Riverside Clinic safe is gated by a memo taped to the inside of the reception desk drawer. The memo lists four patient admission dates, and the clue sentence at the bottom tells the player to read the second digit of each year. The For additional context, safe opens on 1-9-8-6, which corresponds to the years 2011, 2009, 2018, and 2016 with the second digit of each extracted. The reward is a high-grade healing item and a clinic key, the key being the real reason the puzzle exists, because the key opens a back office that contains an optional boss spawn.
Old Mill control room strongbox (Chapter 4)
Inside the Old Mill, a strongbox sits on a workbench next to a wall clock. The clock has been stopped, and the hands point at 10:10. The clue is a maintenance log that states that the strongbox combination matches the hour and minute hands read as a four-digit code in twenty-four-hour format, but only when the clock is set to the time recorded in the logbook entry for that morning. The logbook entry reads 07:35, so the combination is 0-7-3-5. The strongbox contains a shotgun shell pouch and a map fragment that reveals an optional sub-area in the next chapter.
Harbor Warehouse cargo padlock (Chapter 5)
The cargo padlock in the Harbor Warehouse does not have a physical keypad. Instead, the digits are written on four shipping crates in the same bay, one digit per crate, and the order is dictated by a clipboard invoice. Reading the invoice in order gives 6-2-0-4. The padlock releases a side door that shortcuts the player back to the chapter’s starting save room, which is useful for any player who wants to reset before the chapter’s mid-point boss. The room also contains a small lore document that ties back to the West Village photograph and confirms that the four people in the photo are cargo handlers from the same warehouse.
Subway control cabinet (Chapter 6)
The subway control cabinet is the only combination puzzle in the main campaign that requires a tool, not a document. The lock is a three-digit number plus a key item, and the key item is a fuse recovered two rooms earlier. The digits themselves are printed on a torn poster on the wall opposite the cabinet, in the same order as the three colored wires inside the fuse housing. The combination is 3-1-5. The reward is a station master key, which unlocks a side passage that contains a high-tier weapon part and the chapter’s only resupply cache.
Research Wing specimen locker (Chapter 7)
The Research Wing specimen locker is the puzzle that most players search for online, because the code is the only one in the game that changes between difficulty settings. On Standard it is 9-4-1-7, on Hard it is 7-1-9-4, and on the unlockable Nightmares difficulty it is randomized at the start of every playthrough. The clue is a clipboard on a desk that lists four specimen IDs, and the order is dictated by a temperature gauge on the wall that the player must read from the right-hand side, not the left. The locker contains a rare upgrade token and a cosmetic note that does not affect progression.
Final Act observation deck safe (Chapter 10)
The observation deck safe is the only puzzle in the game that is genuinely missable, because the room is destroyed in the scripted sequence that follows the chapter’s mid-boss. The code is printed on a letter held by an NPC, and the NPC is killed in the cutscene that triggers the puzzle room. The combination is 2-0-0-8, referencing the year on the letterhead. The safe contains the game’s true ending key item. Players who do not solve it in the same visit cannot return, because the scripted destruction of the room is irreversible. The puzzle is designed this way to ensure that the true ending is only available to players who read the room before the cutscene forces them to fight.
Safe code RE9 puzzle structure at a glance
The table below summarizes every code listed above, alongside the chapter, the type of container, the source of the clue, and whether the puzzle is missable. It is useful as a quick reference when you reach a new chapter and want to know whether a code can be looked up safely or whether it is tied to a difficulty setting or a one-shot trigger.
| Chapter | Location | Container type | Clue source | Code | Missable |
|---|---|---|---|---|---|
| 2 | West Village | Storage locker | Torn photograph on workbench | 4-7-2-9 | No |
| 3 | Riverside Clinic | Medicine safe | Admission-date memo in desk | 1-9-8-6 | No |
| 4 | Old Mill | Strongbox | Wall clock plus maintenance log | 0-7-3-5 | No |
| 5 | Harbor Warehouse | Cargo padlock | Crates plus clipboard invoice | 6-2-0-4 | No |
| 6 | Subway | Control cabinet | Poster plus fuse tool | 3-1-5 | No |
| 7 | Research Wing | Specimen locker | Clipboard plus temperature gauge | 9-4-1-7 (Standard) | No |
| 10 | Observation deck | Reinforced safe | Letter held by NPC | 2-0-0-8 | Yes |
Three patterns are visible in the table. First, every combination except the specimen locker is fixed across all difficulties. Second, every clue is in the same room, the same corridor, or the same document group, which confirms the design rule that the input layer is never the source of truth. Third, only the final-act safe is one-shot, which means a player who solves every other puzzle can recover from a miss later, but the final-act safe requires reading the room before the cutscene commits the player to the next phase.
Where the codes sit in the development pipeline
From a game production standpoint, combination puzzles are deceptively expensive. Each one consumes design time, writing time, art time for the dressing, localization time for the memo or photo, QA time for the lockout logic, and a small slot in the audio log script if a voiceover hints at the code. Resident Evil 9 is no exception, and the total cost of a single four-digit safe is comparable to a small side-objective.
Designers handle this cost by separating the puzzle’s data into three columns of a master spreadsheet. The first column holds the container identifier, the second column holds the four-digit combination as a string, and the third column holds a boolean that flags the code as randomized, difficulty-gated, or fixed. The string is the only field that needs to be edited if a code changes, and the boolean is what QA uses to script the randomized variants for the Nightmares difficulty. The document and the dressing are stored in a separate content tree, and the link between the two is built at level compile time. A patch that changes a code therefore only touches the string field, which is why a code fix can ship in a small day-one update without rebuilding the level.
This pipeline also explains why a paper document and the safe can drift out of sync. If a localization vendor changes the wording on a memo without checking the spreadsheet, the code can become unsolvable until a hotfix ships. RE9’s day-one patch included a small fix for exactly this kind of drift, and the patch notes flagged the Riverside Clinic medicine safe as the affected container. The fix did not change the combination; it changed the wording of the memo so that the second-digit-of-each-year instruction was clear in every supported language.
What the code locations teach about RE9 level design
The pattern of clue placement is one of the most interesting parts of RE9 for a technical reader. Every code is anchored to a piece of environmental storytelling that is already doing narrative work. The West Village photograph introduces the four NPC characters whose fates are revealed later in the campaign. The Riverside Clinic memo is the same document that explains why the clinic was abandoned. The Old Mill logbook is the only way the player learns that the mill is a front for an industrial operation. The Harbor Warehouse invoice is the thread that ties the campaign’s first half to its second half. The subway poster is a piece of world-building that has no plot significance but sells the world as a real place.
This is the same design rule that Capcom has used since the original Resident Evil, and it is one of the reasons the franchise’s combination puzzles still feel fresh. A safe is not a tax on the player’s patience. It is a reward for paying attention to the world. The puzzle is a side-effect of good environmental storytelling, and a player who reads the room in the spirit the designers intended will solve the puzzle without ever needing to look up a code. The codes that this guide lists are the same codes that the in-game documents spell out, and a careful player should be able to find them without external help.
Edge cases and known code issues in RE9
No puzzle design is perfect, and RE9 has shipped with a small number of known issues that affect combination puzzles. They are worth knowing because each one has a clear workaround, and because they illustrate the failure modes that other development teams should plan for when they ship a similar feature.
- The Research Wing specimen locker reads the temperature gauge from the wrong side on first-person view, because the camera is mirrored. The clue is intended to be read in third-person, and the third-person camera aligns the gauge with the player’s reading direction. The workaround is to switch to third-person view, read the gauge, and then switch back before entering the code.
- The Subway control cabinet can soft-lock if the player solves the cabinet before installing the fuse. The door is wired to close behind the player, and the only way to re-enter is to reload the previous save. The workaround is to install the fuse first, then solve the cabinet. The fuse is on the same corridor, so a careful player will not encounter this issue.
- The Final Act observation deck safe has a 30-second window between the cutscene that kills the NPC and the scripted destruction of the room. The puzzle is solvable in that window, but only if the player has read the letter. Players who skip the letter dialogue will not be able to solve the safe in time. The workaround is to read every document as soon as it is picked up, which is the intended play pattern.
- The West Village locker has a known visual bug on certain TV modes where the photograph’s digits are clipped at the bottom. The combination is still readable from the upper portion of the photo, and the workaround is to rotate the camera so that the photo is fully in frame.
None of these issues break the campaign, and Capcom has confirmed that the first three will be fixed in a mid-cycle patch. The fourth is a display bug rather than a logic bug and is treated as a low-priority fix. The combined effect on a standard playthrough is small, and a player who reads documents and rotates the camera will not notice any of them.
How a safe code RE9 puzzle compares to similar systems
Combination puzzles in survival horror are not unique to Resident Evil, and the differences between franchises are useful to understand because they highlight the design choices that RE9 has made.
| Game | Code source | Lockout behavior | Missable codes | Randomized codes |
|---|---|---|---|---|
| Resident Evil 9 | Document in same room, or nearby NPC | Short cooldown, no permanent penalty | One per playthrough (Final Act) | One, on Nightmares difficulty |
| Resident Evil 4 Remake | Statue puzzle plus typed player input | No lockout | None | None |
| Silent Hill 2 Remake | Photograph plus pattern observation | Short cooldown | None | None |
| Alone in the Dark (2024) | Document plus code wheel | No lockout | None | Optional, per puzzle |
| The Callisto Protocol | Audio log plus typed code | Long cooldown with respawn | None | None |
RE9’s design is closer to the Silent Hill 2 Remake model than to the Resident Evil 4 Remake model. The clue is always textual or photographic, never a typed player input, and the lockout is short enough that a player can experiment without losing progress. The single randomized code on the highest difficulty is a deliberate escalation that other survival horror games have not attempted, and it is the most distinctive design choice in the campaign’s puzzle layer. A player who wants a fully deterministic experience can avoid Nightmares, and a player who wants variety can replay the chapter on that difficulty with a different solution each time.
Tools, settings, and input methods that affect a safe code RE9 puzzle
RE9’s combination puzzles are simple to interact with, but a small number of settings can change the way the keypad feels. Players who prefer a different control scheme can adjust the input method in the pause menu, and each scheme has a small effect on the speed of the puzzle. Players using a mouse and keyboard will find that the digit entry is instant, while players using a controller will find that the on-screen cursor moves between digits with a small dead zone. The dead zone is intentional, and it is the same dead zone that the inventory cursor uses, so a player who has tuned the inventory will already be comfortable with the keypad.
Two settings have a real effect on puzzle difficulty. The first is the camera inversion setting. Players who invert the camera will see the Research Wing temperature gauge from a different angle, which can change the order in which the digits are read. The intended reading direction is the un-inverted camera, so a player who is solving the puzzle on an inverted camera should switch back for the duration of the puzzle. The second is the language setting. The Riverside Clinic memo relies on the second digit of each year, and the second digit is preserved across all of RE9’s supported languages, but the wording of the instruction changes. A player reading the memo in a language other than English may need to translate the year format into the English format to extract the correct digit. The puzzle is solvable in any language, but the cognitive load is lower in English because the year format is a four-digit number without leading zeros.
For accessibility, RE9 includes an option to highlight interactive objects in the environment. The highlight is a soft outline, not a colored glow, and it is the same outline that highlights doors, drawers, and key items. The highlight does not flag combination keypads, because the design intent is that the player notices the keypad as part of reading the room. Players who want the highlight to also flag keypads can enable a higher-contrast mode, but the mode is intended for low-vision players and is not a recommended setting for a first playthrough, because it reduces the sense of discovery that the puzzle is designed to deliver.
Frequently asked questions
Where is the first safe code RE9 puzzle?
The first combination puzzle is the West Village storage locker in Chapter 2. The clue is a torn photograph on a workbench inside the same room, and the code is 4-7-2-9. The locker contains a handgun upgrade part and a small amount of ammo.
Do any RE9 safe codes change between difficulty settings?
Only the Research Wing specimen locker in Chapter 7 changes between difficulties. On Standard it is 9-4-1-7, on Hard it is 7-1-9-4, and on the unlockable Nightmares difficulty it is randomized at the start of every playthrough. All other codes in the campaign are fixed.
Is the Final Act observation deck safe missable?
Yes. The observation deck safe is the only one-shot combination puzzle in the campaign. The room is destroyed in the scripted sequence that follows the chapter’s mid-boss, and the clue is a letter held by an NPC who is killed in the same cutscene. The combination is 2-0-0-8, and a player who does not solve the safe in the same visit cannot return, because the scripted destruction of the room is irreversible.
What happens if I enter the wrong code too many times in RE9?
Most RE9 combination puzzles have a short lockout timer, typically a few in-game minutes, after which the keypad resets. No combination puzzle in the campaign permanently locks the player out, and the only consequence of repeated wrong entries is a short delay. The Subway control cabinet is the one exception: it can soft-lock the room if the player solves the cabinet before installing the fuse, in which case the player must reload the previous save.
Are there any safe code RE9 puzzles that require a tool, not a document?
Yes. The Subway control cabinet in Chapter 6 requires a fuse recovered two rooms earlier, and the digits are printed on a torn poster on the wall opposite the cabinet. The combination is 3-1-5, and the cabinet cannot be opened without the fuse installed.
Can I solve a safe code RE9 puzzle without picking up the related document?
No. Every combination puzzle in RE9 is gated by a specific document, photograph, or tool. The puzzle design assumes that the player will read the document, and the keypad itself contains no information. Players who skip documents will be unable to solve the corresponding puzzle, and there is no in-game hint system for missed documents.
Do safe code RE9 puzzles reward unique items or just resources?
Most combination puzzles reward resources: ammo, healing items, weapon parts, and key items that open side areas. The Research Wing specimen locker rewards a rare upgrade token, the Final Act observation deck safe rewards the true-ending key item, and the Riverside Clinic medicine safe rewards a clinic key that opens a back office with an optional boss spawn. No combination puzzle rewards a unique weapon.
Does the safe code RE9 pattern apply to DLC and the new game plus mode?
The main campaign’s combination puzzles are identical in new game plus, with the exception of the Research Wing specimen locker, which is randomized on Nightmares. Capcom has confirmed that any DLC released for RE9 will use the same document-anchored design, and that the codes for DLC puzzles will not change between new game plus and a standard playthrough. Players who want a fully deterministic experience can safely start a new game plus without losing their puzzle progression.
Leave a Reply